SolutionComments Off on Manage KVM (QEMU) with Kimchi (web interface)
Sep072015
Kimchi is a HTML5 based web interface for KVM. It is provides easy and flexible interface to create and manage a guest virtual machines. Kimchi is installed and runs as a daemon on the KVM host. It manages KVM guests with the help of libvirt. Kimchi interface supports all latest version of the browsers with -1 version, it also supports mobile browsers.
Kimchi can be installed on latest version of RHEL, Fedora, openSUSE and Ubuntu. In this guide, i used Ubuntu 14.10 as a KVM host.
Before configuring kimchi, you must install the following dependent packages.
$ make
$ sudo make install   # Optional if running from the source tree
Run kimchi.
$ sudo kimchid --host=0.0.0.0
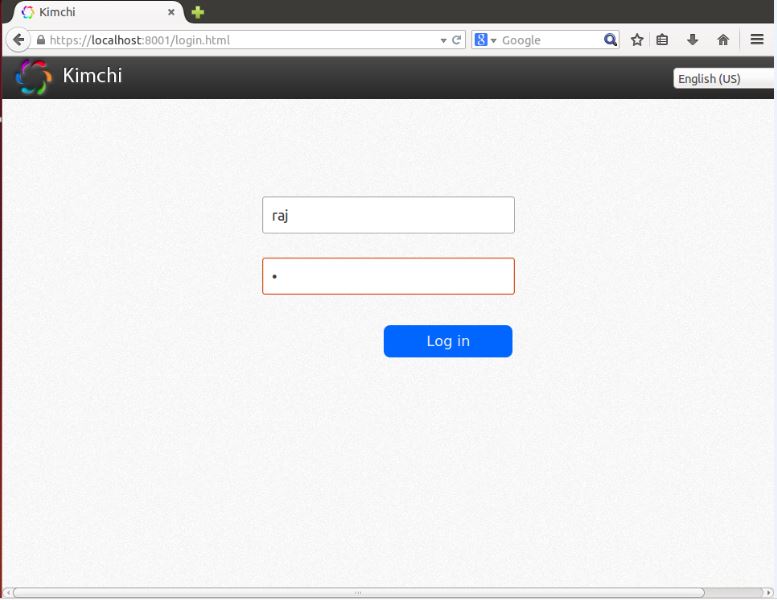
Access kimchi using web browser, https://localhost:8001. You would be asked to login, use your system credential which you normally use for login to system.
Kimchi Login Page
Once you logged in, you will get a page like below. This show the list of running guest virtual machines on current host, you have buttons to perform shutdown, restart and connect to console by clicking on action.
Kimchi guest virtual machines
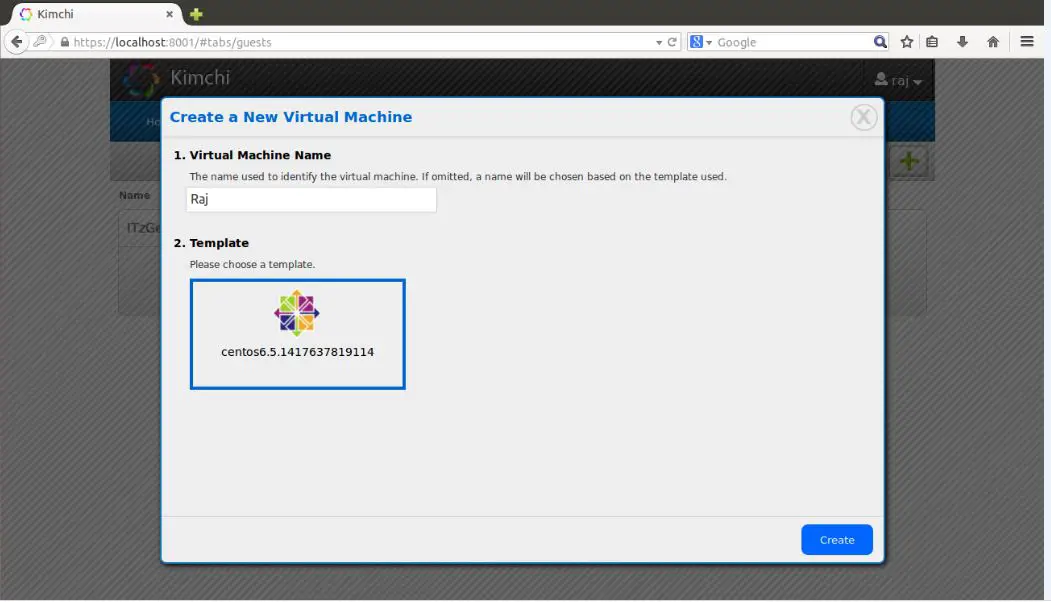
To create a new guest machine, click on the + sign in the right corner. If you use this option to create a machine, it will be done through templates.
Kimchi Creating Virtual Machine
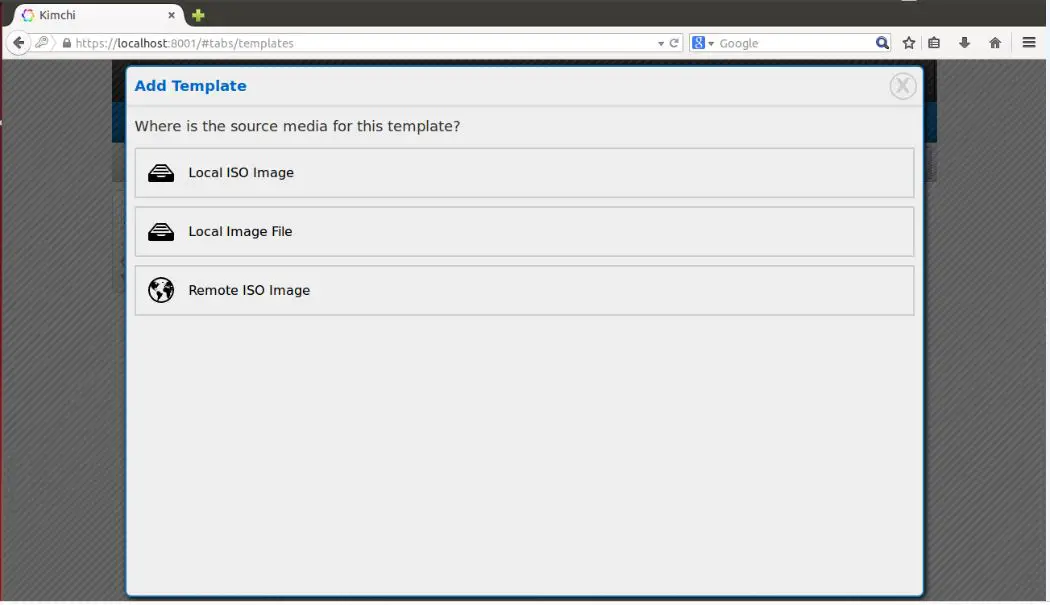
You can manage templates by visiting templates menu. To create a new template, click on the + sign in the right corner. You can create a template using ISO images, you can place iso images on /var/lib/kimchi/isos or use remote one.
Kimchi Creating Template
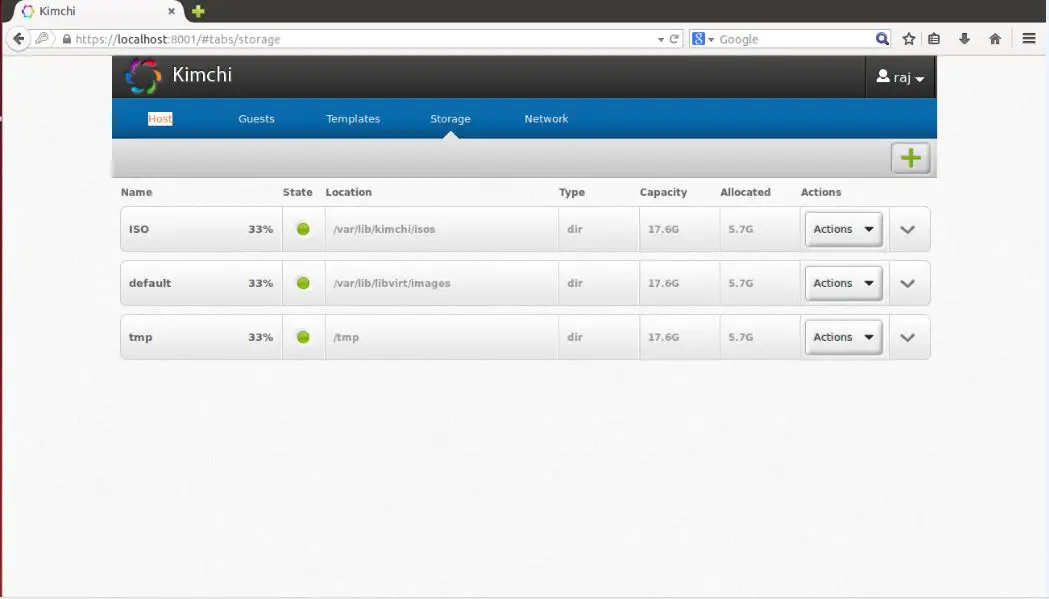
You can manage storage pool by going to storage menu, there you can add a new storage by clicking on + sign. It supports adding NFS, iSCSI and SCSI fibre channel storage.
Kimchi Storage Management
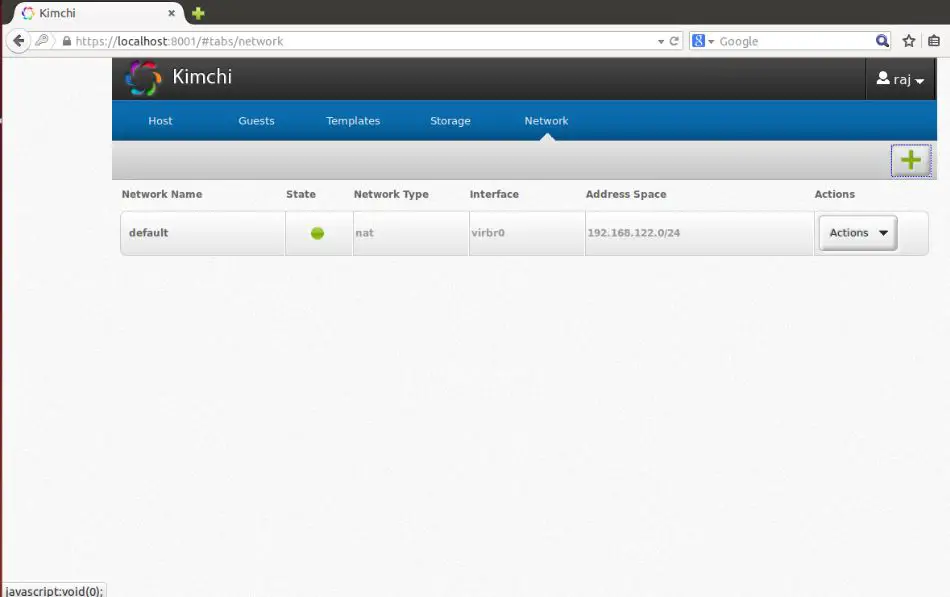
Network can be managed by going to network menu, you can create a new network with isolated, NAT and bridged networking.
SolutionComments Off on How to install Elasticsearch, Logstash and Kibana 4 on Ubuntu 14.04 / 15.04
Sep072015
ELK Stack
In this post, will look how to install Elasticsearch, Logstash and Kibana 4 on Ubuntu 14.04 / 15.04. This ELK stack help us to store and manage the logs in a centralized location. ELK stack consists of four vital components that makes a wonderful stack to analyze the problems by correlating the events on a particular time.
Centralizing logs will make a system admin life easier to analyze the problems and issues without going to each machine for logs, and visualize those logs to management for business requirements.
Components:
Logstash – It does the processing (Collect, parse and send it to Elasticsearch) of incoming logs.
Elasticsearch – Stores the logs coming from Logstash.
Kibana 4 – Web interface for visualizing the logs (has an own interface). The above three are installed on server.
Logstash-forwarder – Installed on client machines, sends log to Logstash through lumberjack protocol.
Application versions:
This article uses below version of softwares for ELK stack.
Elastisearch 1.7.0
logstash-1.5.3
Kibana 4.1.1
logstash-forwarder-0.4.0
Prerequisites:
1. We would require to install either openJDK or Oracle JDK, It is recommended to install Oracle JDK.Verify the java version by using the following command.
$ java -version

java version "1.8.0_11"
Java(TM) SE Runtime Environment (build 1.8.0_11-b12)
Java HotSpot(TM) 64-Bit Server VM (build 25.11-b03, mixed mode)
Elasticsearch is an open source search server, it offers a realtime distributed search and analytics with RESTful web interface. Elasticsearch stores all the logs sent by the logstash server and displays the messages when the kibana4 requests for full filling user request over the web interface.
Wait, at least a minute to let the Elasticsearch get fully restarted, otherwise testing will fail. Elastisearch should be now listen on 9200 for processing HTTP request, we can use CURL to get the response.
Logstash is an open source tool, used for collecting logs, parsing and storing them searching. Yes, logstash comes with a web interface (kibana3 is built-in) for visualizing logs which we are not going to discuss here instead we use kibana4. Processing of various types of events can be extended by adding plugins to it, over 160 plugins are available as of now. Lets will go directly to the installation.
# echo "deb http://packages.elasticsearch.org/logstash/1.5/debian stable main" | sudo tee -a /etc/apt/sources.list

# apt-get update && apt-get install logstash
Once the logstash server is installed, lets move on to next section
Create SSL certificate:
Logstash-forwarder which will be installed on client-server to ship the logs requires SSL certificate to validate identity of logstash server. We have a two options to create a SSL certificate and it depends on logstash-forwarder configuration; if you use hostname ( “servers”: [ “server.itzgeek.local:5050″ ]), subject name of SSL should match “server.itzgeek.local”. If you use ( “servers”: [ “192.168.12.10:5050″ ]) an ip address, you must create a SSL certificate with IP SAN with value 192.168.12.10.
Follow any one of the method to create a SSL certificate.
Option 1: (Hostname FQDN)
Before creating a certificate, make sure you have A record for logstash server; ensure that client servers are able to resolve the hostname of the logstash server. If you do not have DNS, kindly add the host entry for logstash server; where 192.168.12.10 is the ip address of logstash server and itzgeek is the hostname of your logstash server.
# vi /etc/hosts

192.168.12.10 server.itzgeek.local
Lets create a SSl certificate. Go to OpenSSL directory.
# cd /etc/ssl/
Execute the following command to create a SSL certificate, replace “red” one in with your real logstash server.
This logstash-forwarder.crt should be copied to all client servers those who send logs to logstash server.
Configure Logstash:
Logstash configuration files can be found in /etc/logstash/conf.d/, just an empty folder. We would need to create a file, logstash configuration files consist of three section input, filter and output; all three section can be found either in single file or each section will have separate file ends with .conf.
Here we will use a single file to place an input, filter and output sections.
# vi /etc/logstash/conf.d/logstash.conf
In the first section, we will put an entry for input configuration. The following configuration sets lumberjack to listen on port 5050 for incoming logs from the logstash-forwarder that sits in client servers, also it will use the SSL certificate that we created earlier.
input {
lumberjack {
port => 5050
type => "logs"
ssl_certificate => "/etc/ssl/logstash-forwarder.crt"
ssl_key => "/etc/ssl/logstash-forwarder.key"
}
}
In the second section, we will put an entry for filter configuration. Grok is a filter in logstash, which does parsing of logs before sending it to Elasticsearch for storing. The following grok filter will look for the logs that are labeled as ‘syslog” and tries to parse them to make a structured index.
filter {
if [type] == "syslog" {
    grok {
      match => { "message" => "%{SYSLOGLINE}" }
    }

    date {
match => [ "timestamp", "MMM  d HH:mm:ss", "MMM dd HH:mm:ss" ]
}
  }

}
Consider visiting grokdebugger for filter patterns.
In the third section, we will put an entry of output configuration. This section defines location where the logs get stored; obviously it should be Elasticsearch.
Logstash server logs are stored in the following file, will help us to troubleshoot the issues.
# cat /var/log/logstash/logstash.log
Next we will configure a logstash-forwarder to ship logs to logstash server.
Configure Logstash-forwarder.
Logstash-forwarder is a client software which ship logs to a logstash server, it should be installed on all client servers. Logstash-forwarder can be downloaded from official website or you can use the following command to download it in terminal and install it.
Logstash-forwader uses SSL certificate for validating logstash server identity, so copy the logstash-forwarder.crt that we created earlier from the logstash server to the client.
In the “network” section, mention the logstash server with port number and path to the logstash-forwarder certificate that you copied from logstash server.
This section defines the logstash-forwarder to send a logs to logstash server “server.itzgeek.local” on port 5050 and client validates the server identity with the help of SSL certificate. Note: Replace “server.itzgeek.local” with ip address incase if you are using IP SAN.
In the “files” section, configures what all are files to be shipped. In this article we will configure a logstash-forwarder to send a logs (/var/log/syslog) to logstash server with “syslog” as type.
Access your kibana portal by visiting the following link
http://your-ip-address:5601/
You will get a following page where you have to map logstash index to use kibana. Scroll down on Time-field name and select
@timestamp
Install Elasticsearch, Logstash and Kibana 4 on Ubuntu 14.04 – Index Pattern
Once you selected, it will redirect you to kibana main page.
Install Elasticsearch, Logstash and Kibana 4 on Ubuntu 14.04 – Kibana Discover the Logs
Kibana does not comes with any kind of password protected access to portal. With Nginx, we can configure in such a way that the user should fulfill authentication mechanism before entering to portal.
That’s All, you have successfully configured ELK stack for centralized log management.
SolutionComments Off on Install Tonido private cloud server on Ubuntu 14.04.3 / 15.04
Sep072015
Tonido private cloud server
Tonido is a free application server that helps you to access all your files on your Linux server / machine from a web browser, smart phone, tablet, and even from DLNA enabled devices. Also, you can share them with your family, friends and colleagues. Configure public direct links so that anyone can access the content, additionally, you can create a secure private share to only allow authorized people to access them.
With Tonido, you can stream your Media such as Photos, Audios, and Videos to any devices on your network. It works on Windows, Linux, Mac and all major mobile phones and tablets including iPhone, iPad, Android, Windows Phone 8 and Blackberry. Tonido can also be used to take backup photos / videos from phone to your desktop.
Please note that, Tonido comes in two version, free for SOHO user, and paid for enterprise. In free version, you are allowed to have a custom logo, branding, and identity.
Prerequisites:
Install below dependent packages for Tonido.
$ sudo apt-get install libjpeg8 libfontconfig
Installing Tonido:
Here we will be using free version of Tonido. Please follow below instructions to install tonido on Ubuntu 64 bit, detailed instruction on installing Tonido on 32 bit can be found here.
Lets install curl, we will use this for downloading Tonido using terminal.
$ sudo apt-get update

$ sudo apt-get install curl
Create a directory for Tonido installation.
$ sudo mkdir /usr/local/tonido
Go to that directoryt and download the free version of Tonido from official website.
$ cd /usr/local/tonido
$ sudo curl -o tonido64.tar.gz  http://www.tonido.com/download.php?tonido64.tar.gz
Extract the tar file using below command.
$ sudo tar -zxvf tonido64.tar.gz
Now, run Tonido using command.
$ sudo ./tonido.sh start
Troubleshooting:
If Tonido service is not starting or not listening on port 10001, go through the Tonido logs for any errors.
$ cat /tmp/tonido_<accountname>.log
Configure Tonido:
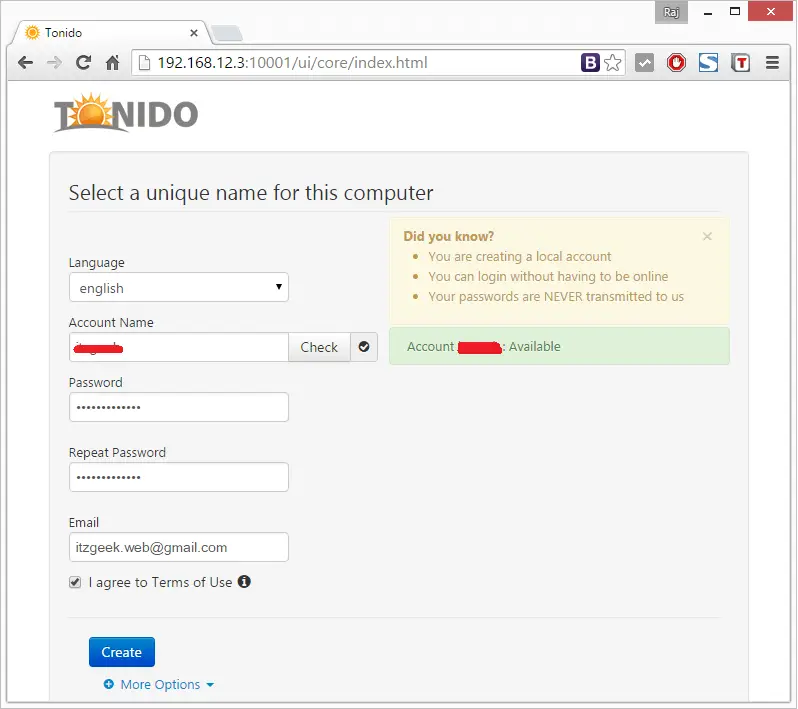
After starting Tonido, open up your web browser and navigate to http://127.0.0.1:10001 or http://ip-add-ress:10001. You should get a below screen.
Now, create a local account. Enter the account name of your choice, password and email id.
Install Tonido – Create an Account
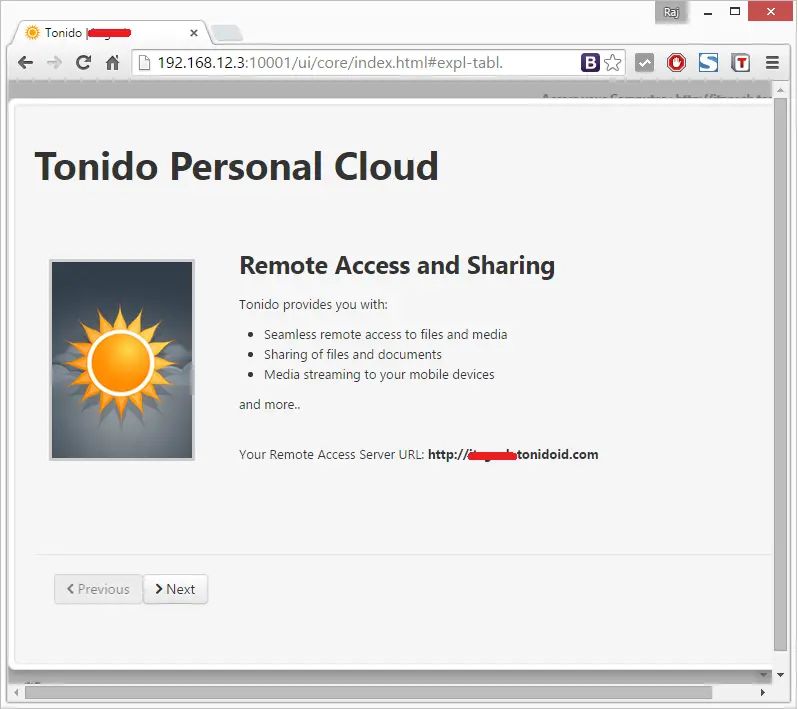
Your remote access server will be created now, URL will look like.
http://<accountname>.tonidoid.com
Install Tonido – Remote Server URL
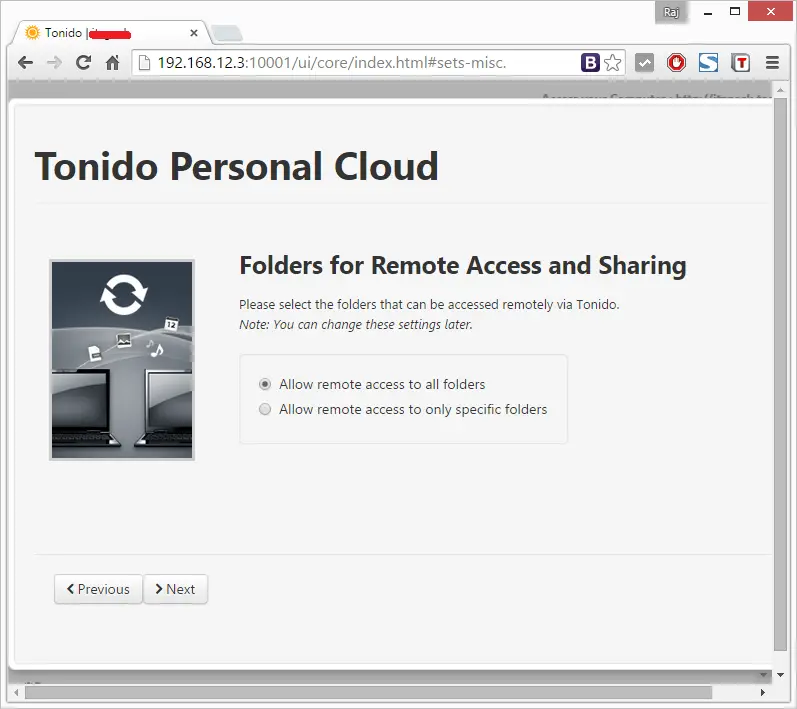
Select the folders that can be accessed remotely via Tonido, you can change these settings later.
Install Tonido – Remote Access and Sharing
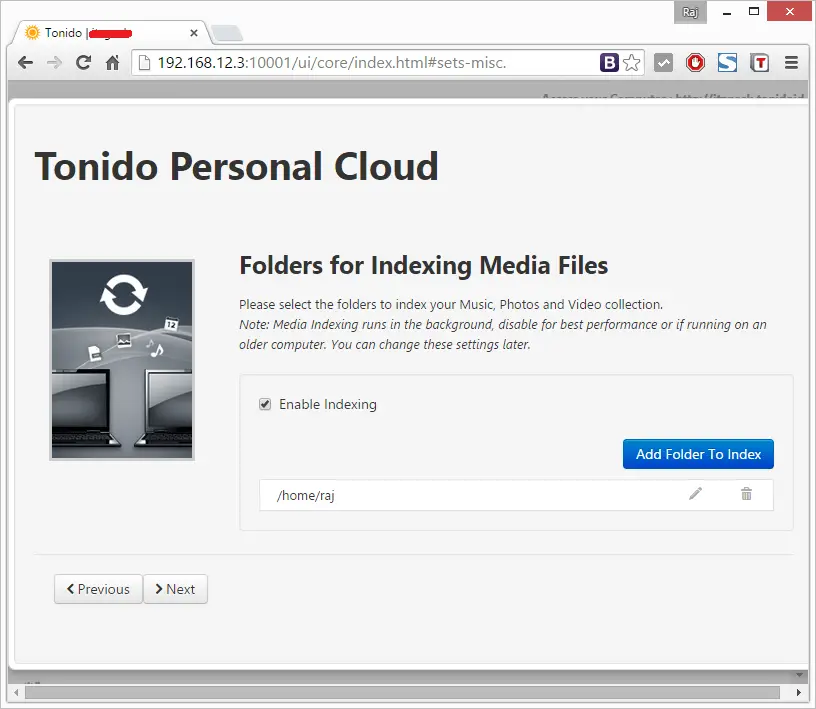
Select the folders to index Music, Photos and Video collection.
Install Tonido – Indexing Media Files
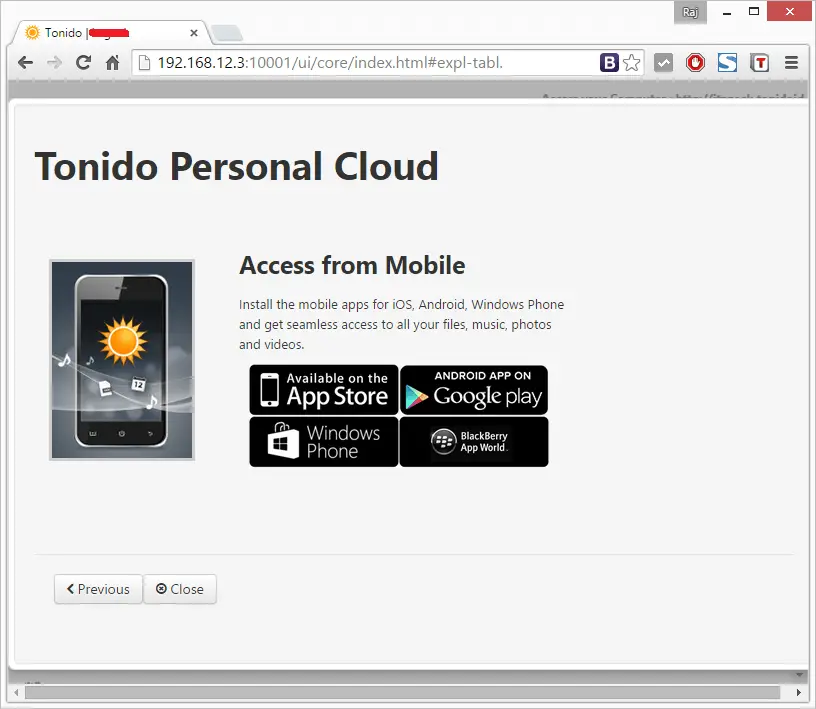
Install the mobile apps for iOS, Android, Windows phone and get access to all your collections. Click on Close to finish the installation.
Install Tonido – Mobile Apps
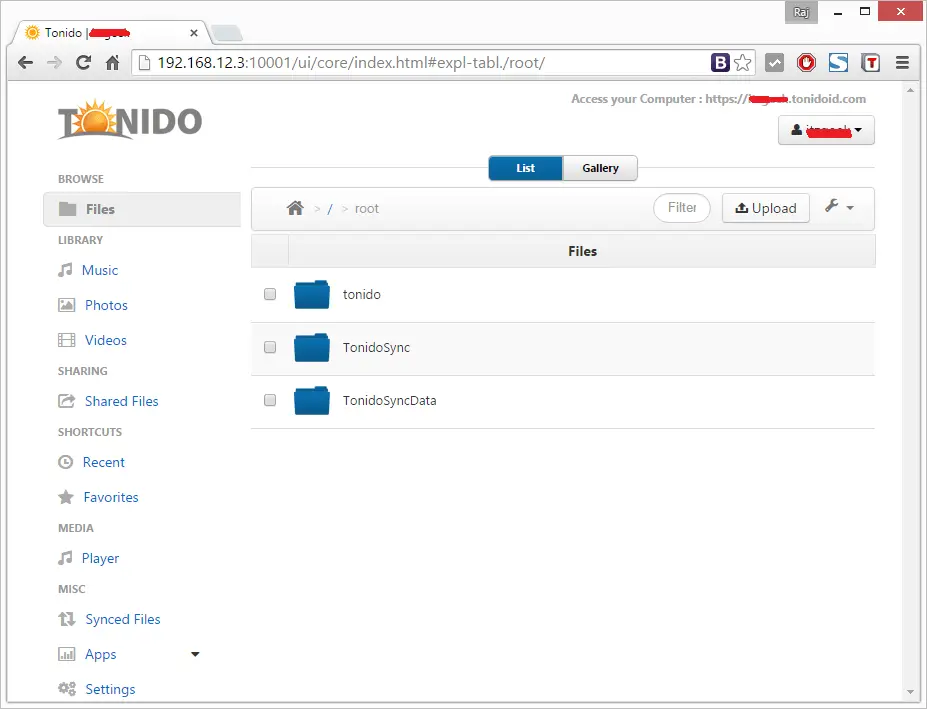
Now, you will be redirected to your Tonido dashboard.
Install Tonido – DashBoard
You can upload your files / Music / Videos by clicking on the upload button.
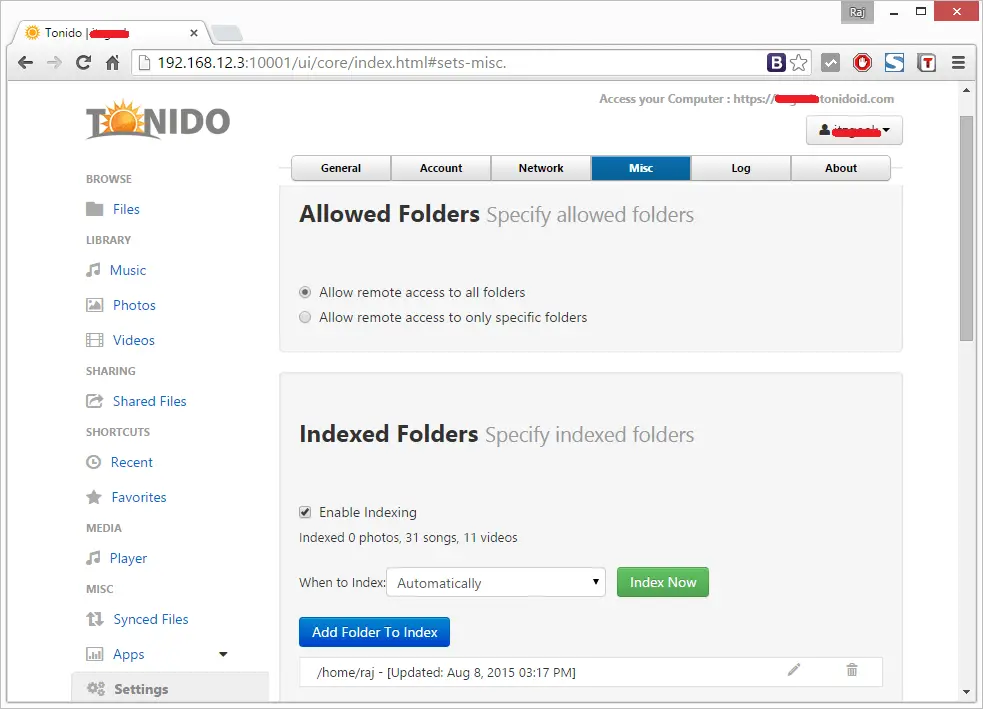
Once you have uploaded the media files, have to manually index those files by going to Settings –> Misc –> Index Now.
Install Tonido – Manual Indexing
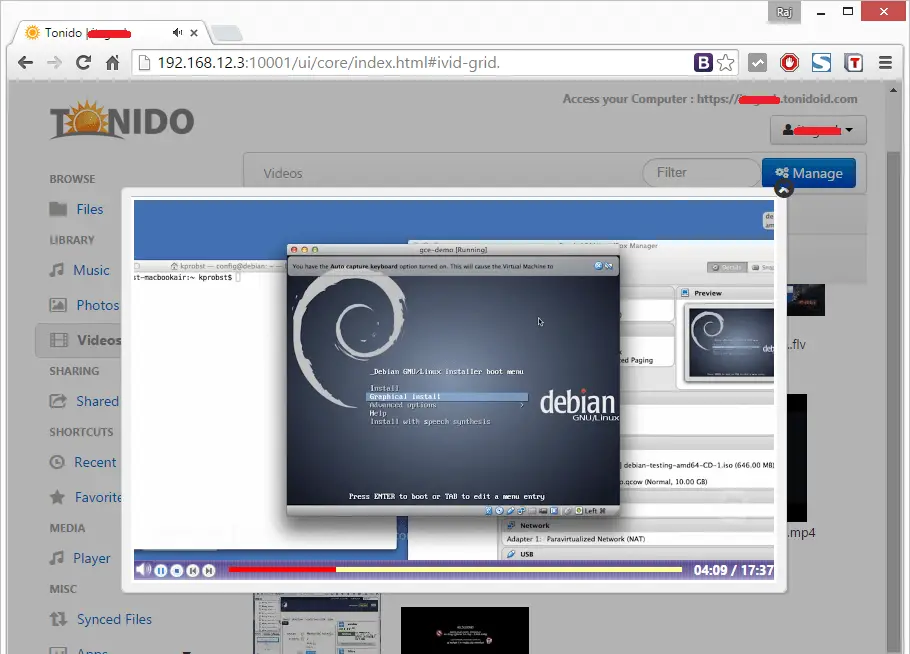
Wait for a minute to get indexing completed, you can play videos by going to Videos section.
Install Tonido – Playing Videos
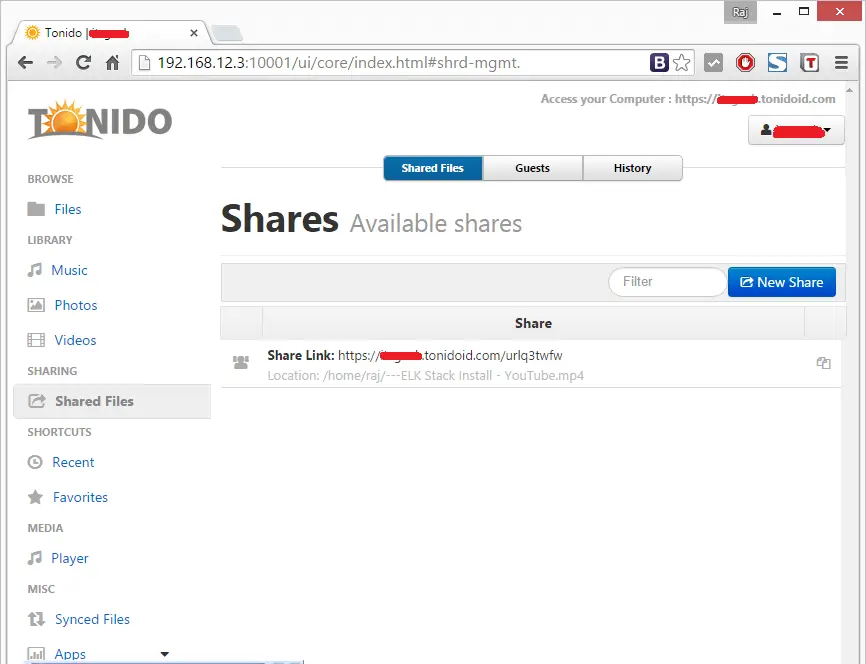
You can share files/folders to your friends, family, and colleagues or to a particular person. To do that, go to Shared files section, click on New Share button and select the file / folder you want to share.
Install Tonido – Sharing File
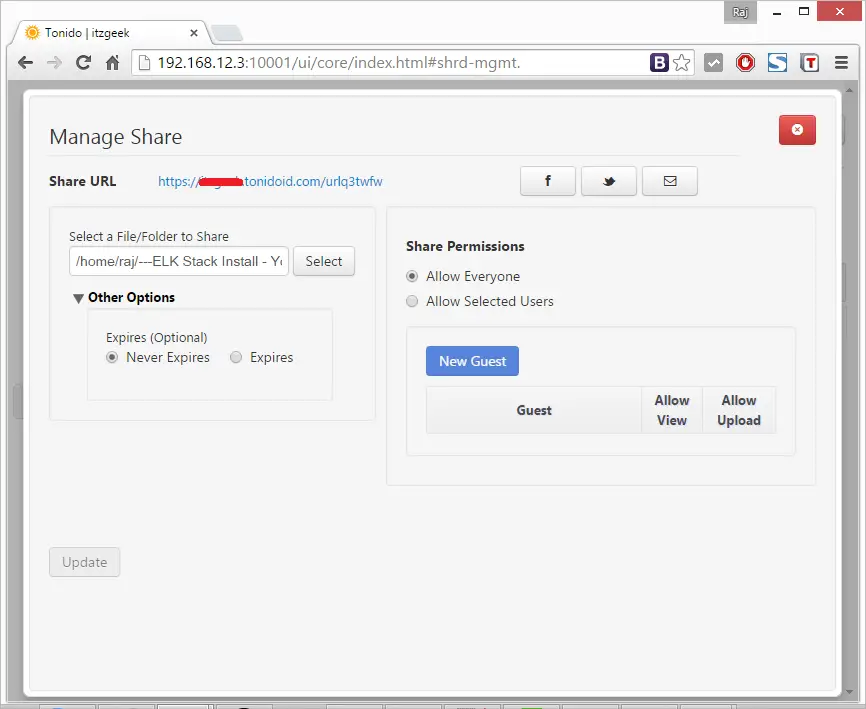
Also, you can share this file to a particular person.
Install Tonido – Sharing Files Permission
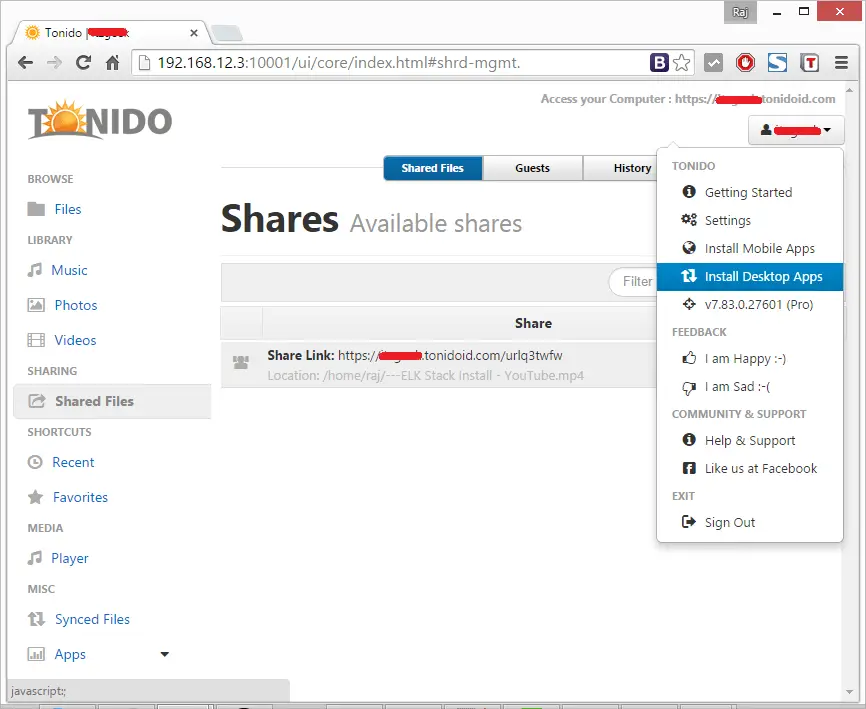
If you want to sync files/folders to multiple systems, you can install the Tonido sync tool. Click the Account name drop-down box, and select Tonido Sync. Since I am using desktop, I selected the Desktop application.
Install Tonido – Sync Files
You will be redirected to the Tonido sync download page. Select and download the Sync app depending upon your operating system.
You can configure app to sync files / folders from your desktop to Tonido.
SolutionComments Off on Register clients with SpaceWalk Server
Sep072015
Spacewalk
This is the third part of Spacewalk installation and configuration series. In the first two parts, we gone through how to install and configure Spacewalk server and managing Spacewalk channels and repositories.
In this tutorial, we will configure clients to take installation packages from the Spacewalk server by registering it with Spacewalk server.
Environment:
OS : CentOS Linux release 7.0.1406 (Core)
Hostname : client.itzgeek.local
IP Address : 192.168.12.4
Install Spacewalk clients:
CentOS Base repository does not have packages that are required for registering clients with Spacewalk server, so we would require to configure Spacewalk repo on client machine.
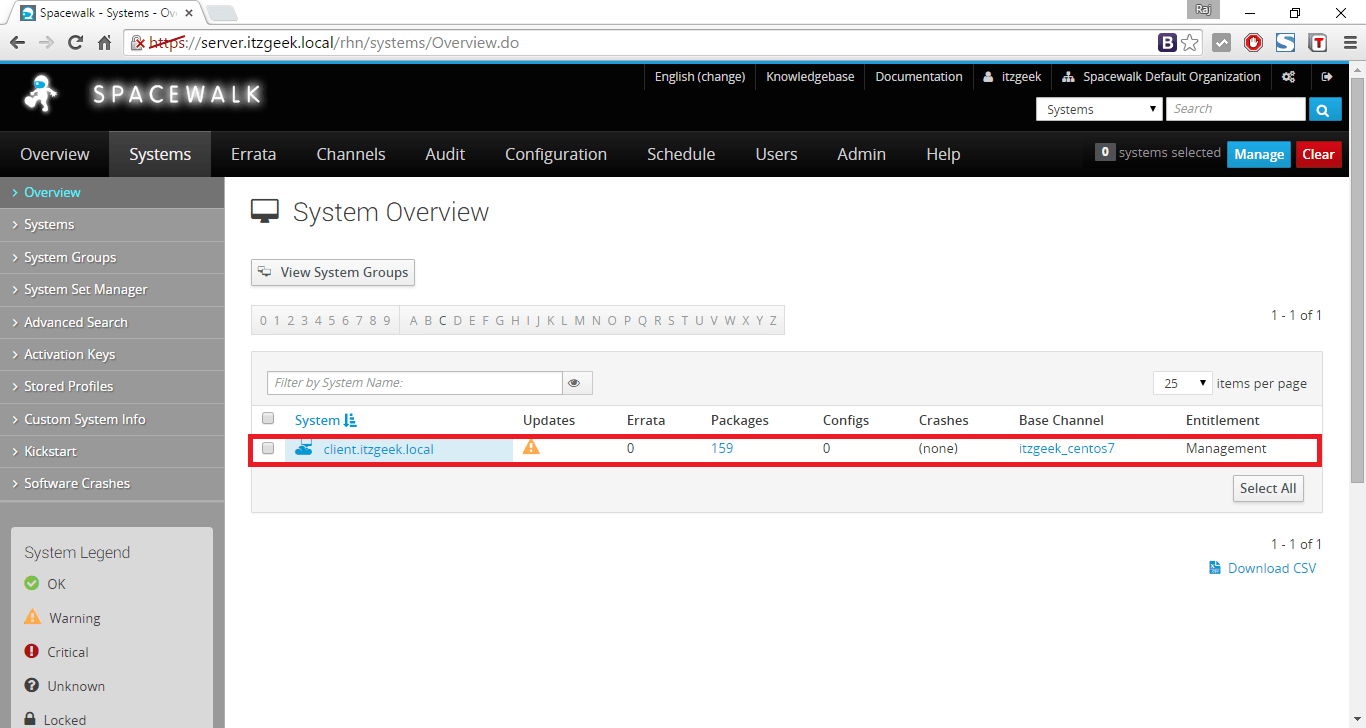
Once the above command is executed, goto Spacewalk console, and click on Systems. You will see our client system that we just registered with Spacewalk.
Register Clients with Spacewalk server – System Overview
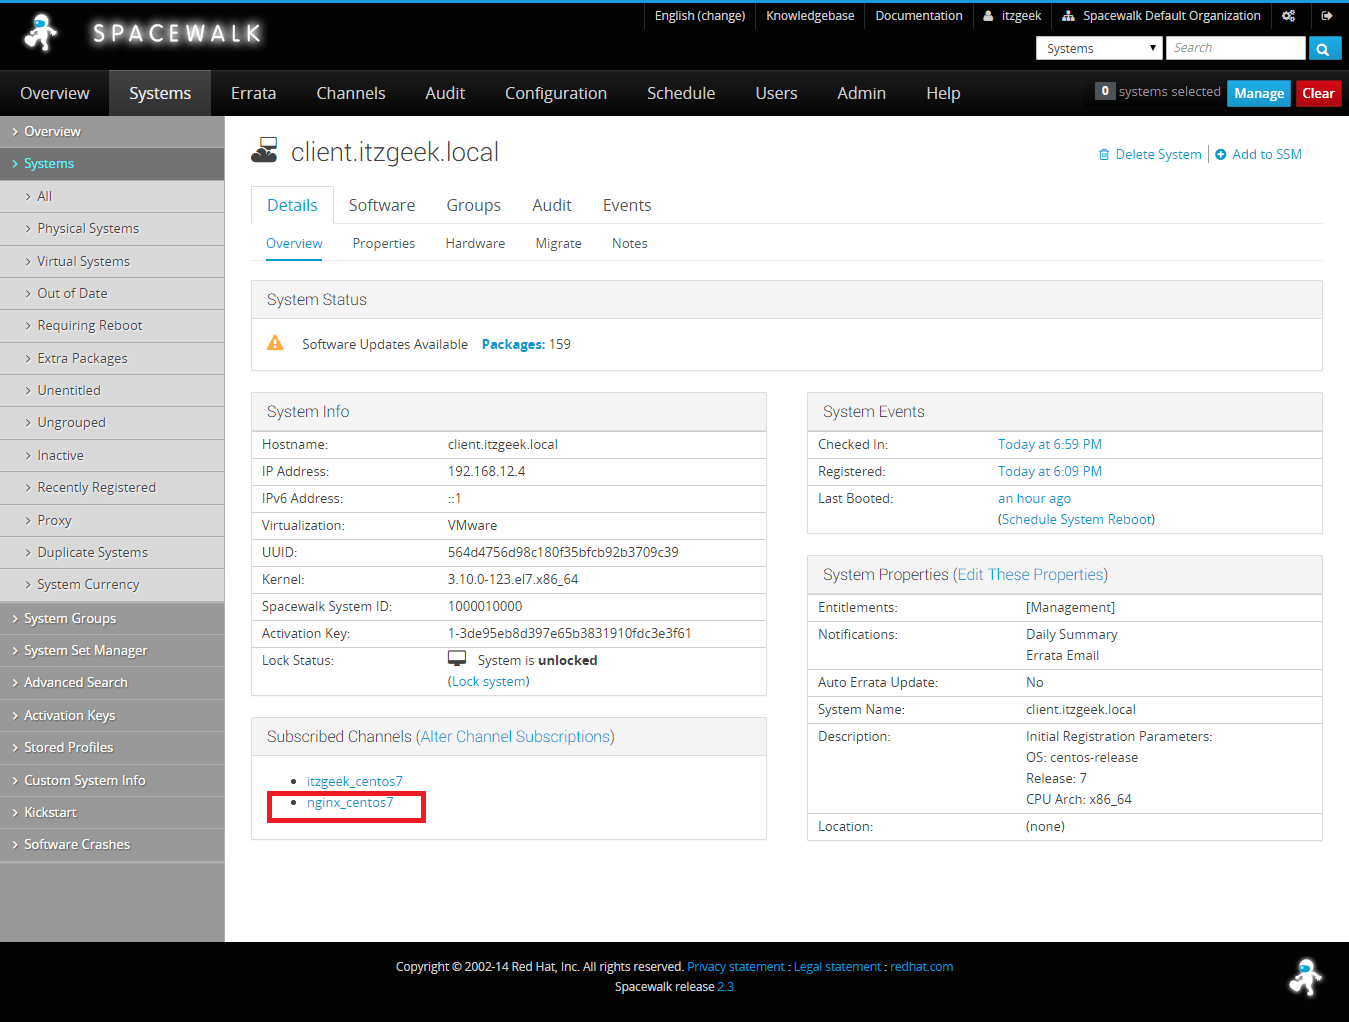
Click on client name, you will be taken to client summary page where you can see detailed information about registered client (client.itzgeek.local). You can see that this system has subscribed automatically to base channel (itzgeek_centos7).
Register Clients with Spacewalk server – Client Overview
Modifying Subscription (Optional):
GUI Mode:
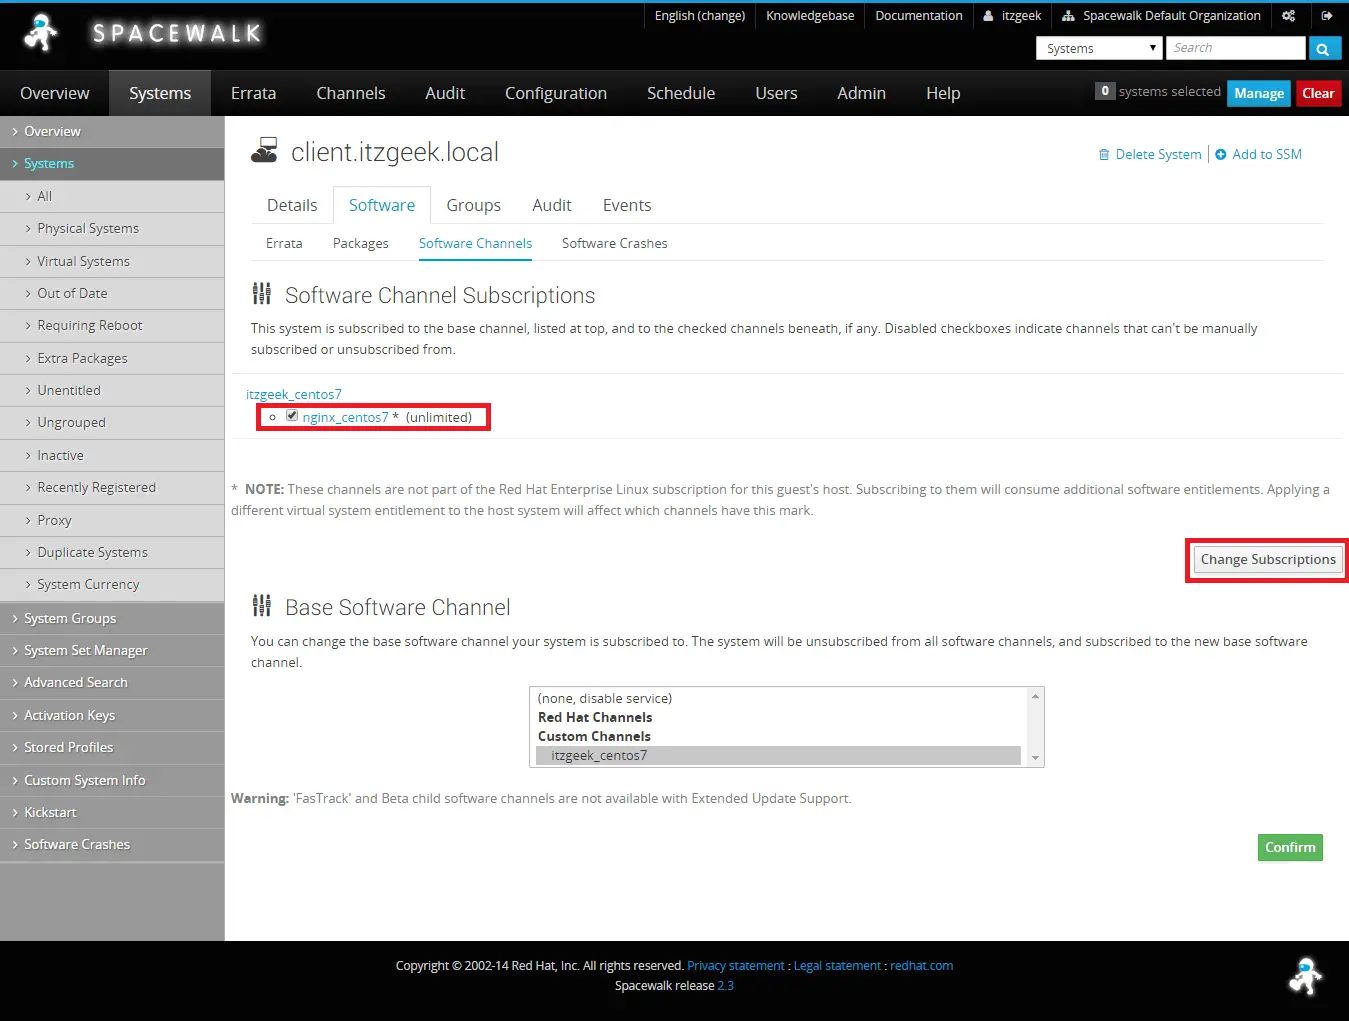
If you want to make a use of child channels (Ex. To install Nginx), To enable the child channels of the base channel to get Niginx packages.
Go to Systems –> <Your Client> –> Software –> Software Channels –> Software Channel Subscriptions.
OR
Click on Alter Subscription Channels on client over page.
Select the Child channels (Ex. nginx_centos7) and click Change Subscriptions.
Register Clients with Spacewalk server – Change Channel subscription
Now, client system is successfully subscribed to Nginx child channel.
Register Clients with Spacewalk server – subscription List
Command Line Mode:
You can also change channel subscription using command Line. To list subscribed channels, run.
# rhn-channel -l
sample output:
itzgeek_centos7
To list the available channels, run.
# rhn-channel -L
sample output:
Username: itzgeek
Password:
nginx_centos7
Now, to subscribe to child channel, run.
# rhn-channel -a -c nginx_centos7
You will have to enter username and password of Spacewalk server admin account.
Veryify the subscription using below command.
# rhn-channel -l
sample output:
itzgeek_centos7
nginx_centos7
If you want to remove child channel subscriptions, run the following command.
# rhn-channel -r -c nginx_centos7
That’s it. You can start to install or update packages from the Spacewalk server. Also, make sure that you have disabled non-Spacewalk repositories.
To do that, run:
# sed -i 's/enabled=1/enabled=0/g' /etc/yum.repos.d/*
To test, install Nginx package on client machine.
# yum install nginx
Sample output:
Loaded plugins: fastestmirror, rhnplugin
This system is receiving updates from RHN Classic or Red Hat Satellite.
Loading mirror speeds from cached hostfile
Resolving Dependencies
--> Running transaction check
---> Package nginx.x86_64 1:1.8.0-1.el7.ngx will be installed
--> Finished Dependency Resolution

Dependencies Resolved

================================================================================
Package      Arch          Version                  Repository            Size
================================================================================
Installing:
nginx        x86_64        1:1.8.0-1.el7.ngx        nginx_centos7        369 k

Transaction Summary
================================================================================
Install  1 Package

Total download size: 369 k
Installed size: 889 k
Is this ok [y/d/N]:

[...]
If you see the above output, the packages are installed from Spacewalk child channel (nginx_centos7).
That’s All. You have successfully registered client systems with Spacewalk server for packages.I plan to cover more topics on Spacewalk server, stay tuned.
SolutionComments Off on Managing Channels and Repositories – Spacewalk on CentOS 7 / RHEL 7
Sep072015
Install Spacewalk
This is the continuation from installing and Configuring SpaceWalk on CentOS 7. This tutorial will show you how to configure Spacewalk to distribute updates for CentOS or RHEL clients.This is a simple step by step process, so i will only mention minimal settings to be done for distributing updates.
Spacewalk Channels:
Channel is nothing but a collection of software packages. A channel may contain packages from a specific distribution, also it may contain packages for an application or family of applications. Users may also define channels.
Any client can subscribe to a particular channel to download, update, install packages. The channels are linked to upstream server (a normal YUM repository). A channel may have linked to multiple repositories, can be cloned, sync or customized.
There are two types of channels:
1.Base channels
2. Child channels
A base channel consists of packages based on a specific architecture and Red Hat Enterprise Linux release. A child channel is a channel associated with a base channel that contains extra packages. A system must be subscribed to only one base channel. A system can be subscribed to multiple child channels of its base channel. A subscribed system can only install or update packages available through its Satellite channels.
Create a Base Channel:
Login to Spacewalk web console, https://spacewalk-server-ip. Enter user name and password that you defined in previous tutorial.
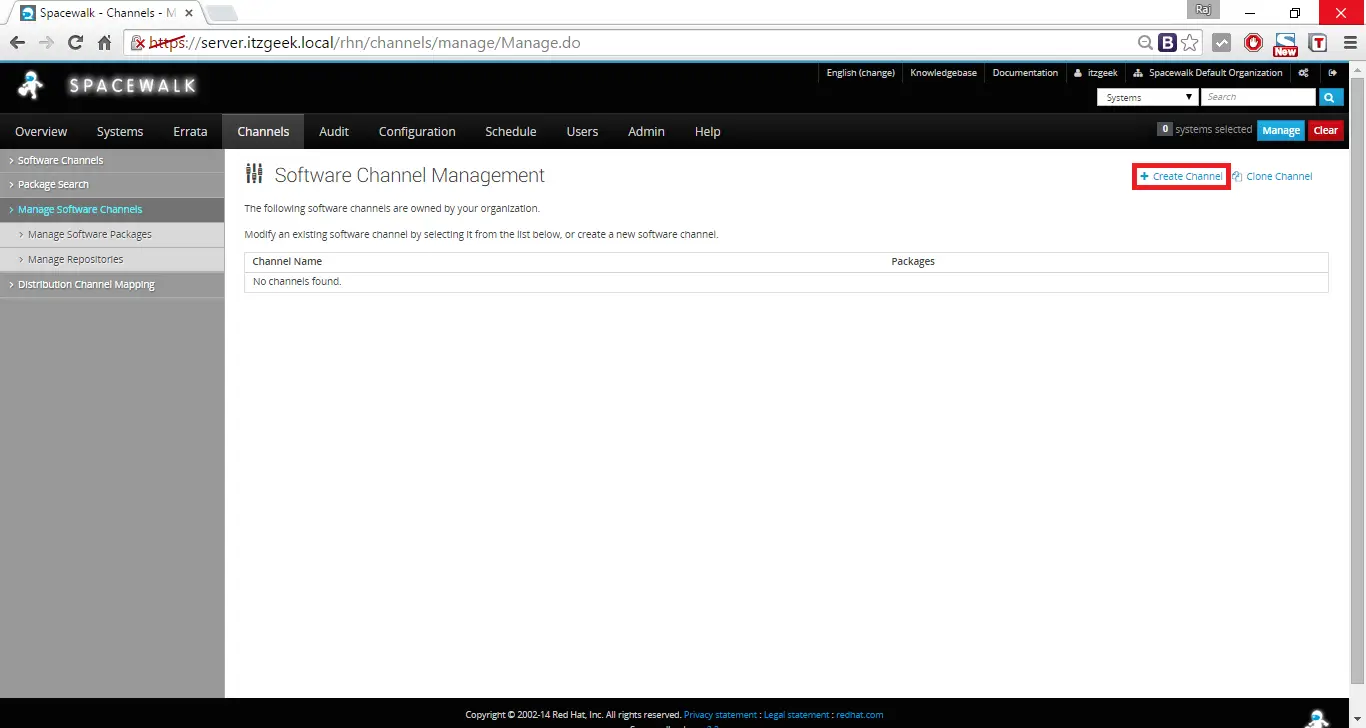
Goto Channels –> Manage Software Channels –> Create New Channel.
Managing Channels and Repositories – Create Base Channel
This is where you can label your different type of architecture. Here i created label “itzgeek_centos7” for CentOS 7 packages, same like you can create label for other architectures and other Linux flavors, label name does not matter; only architecture is important while configuring.
Managing Channels and Repositories – Base Channel Details
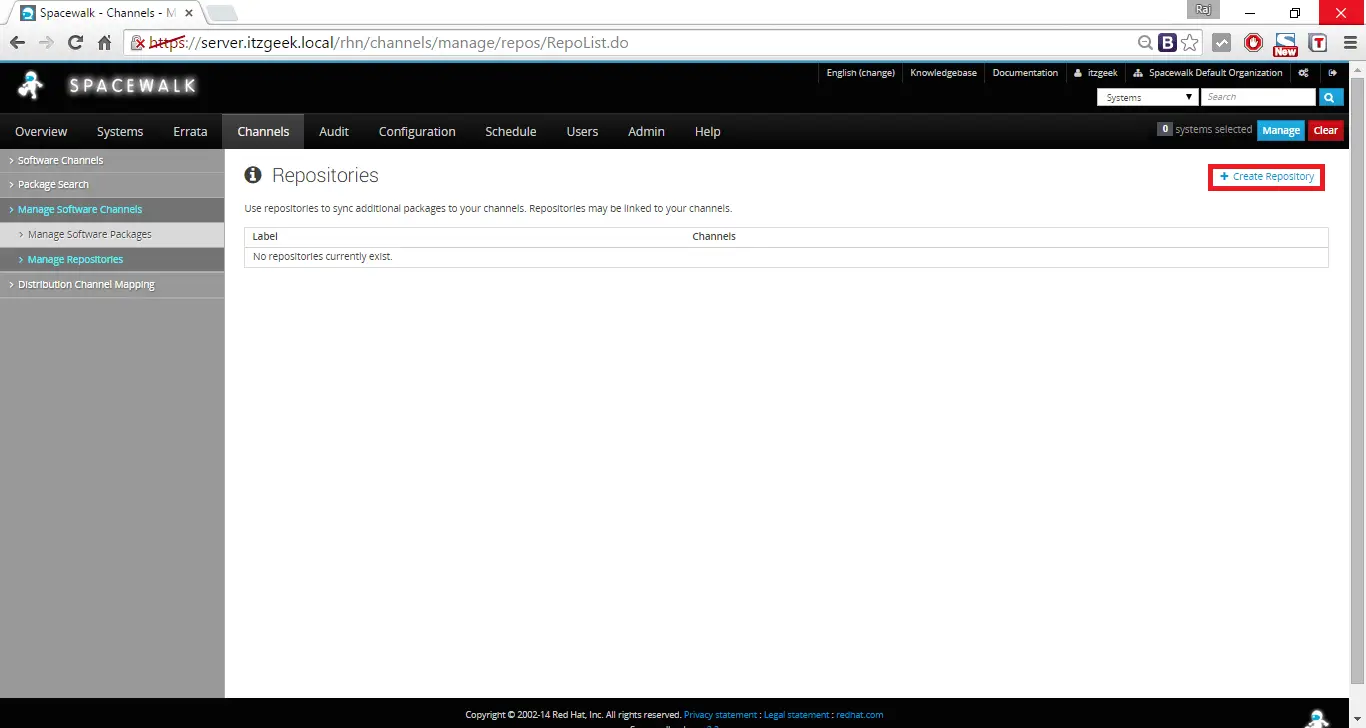
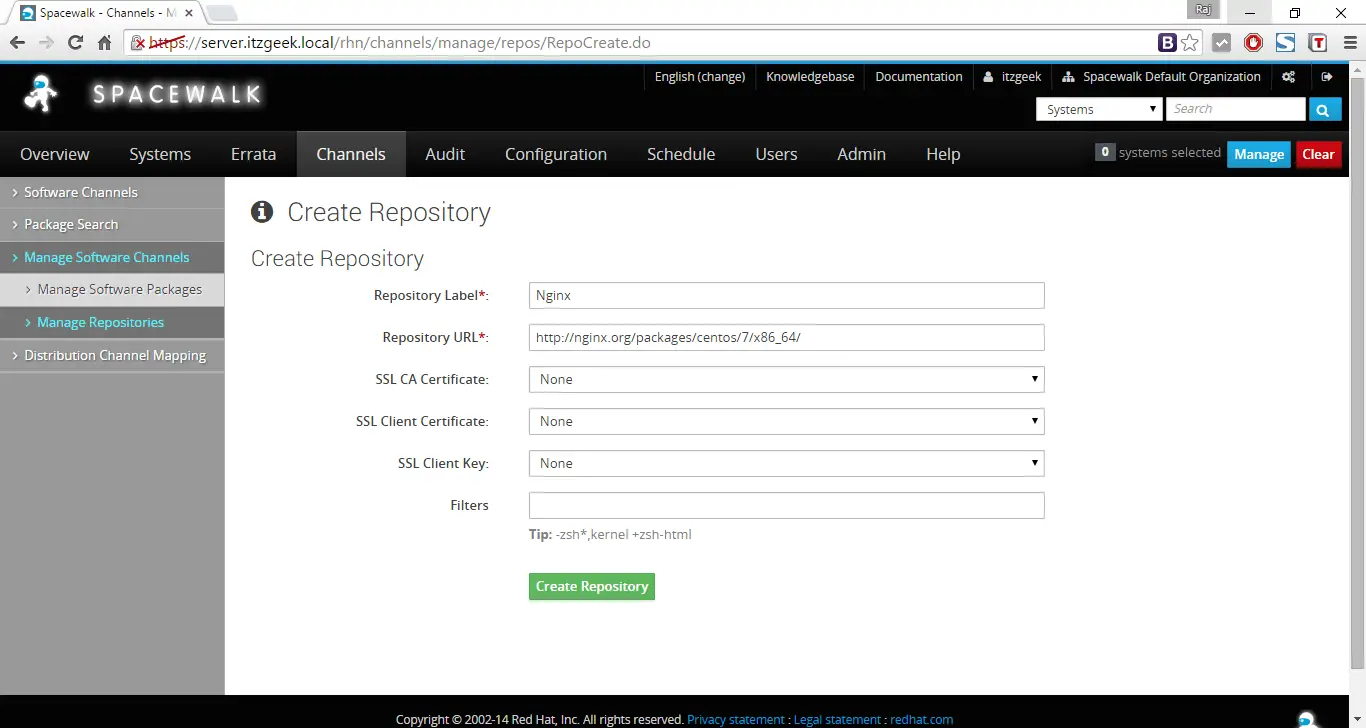
Managing Channels and Repositories – Create a Repository
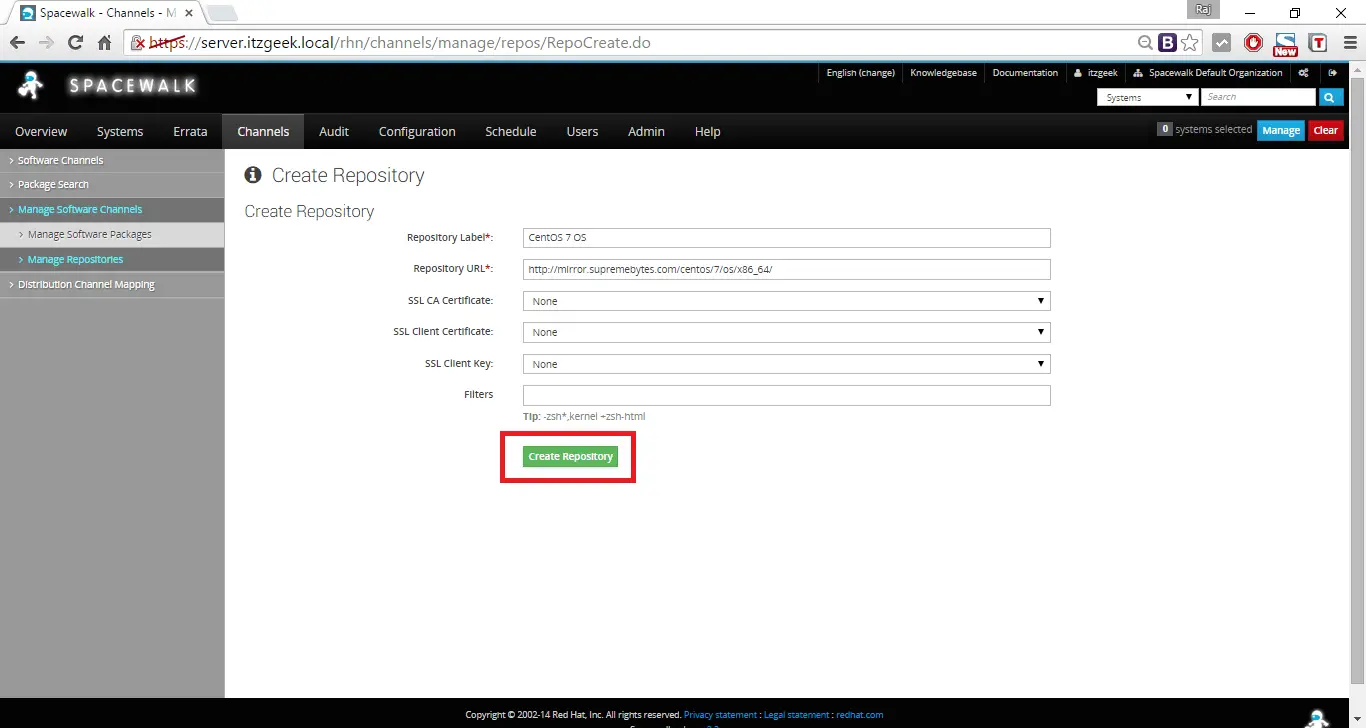
Here you can mention upstream server from where Spacewalk server will download the updated packages for clients. To show you a demo, i used http://mirror.supremebytes.com/centos/7/os/x86_64/as Repository URL. This repository URL is one of CentOS mirror, you can find more mirrors here.
Managing Channels and Repositories – Repository Detail
Assigning a repository to Base channel:
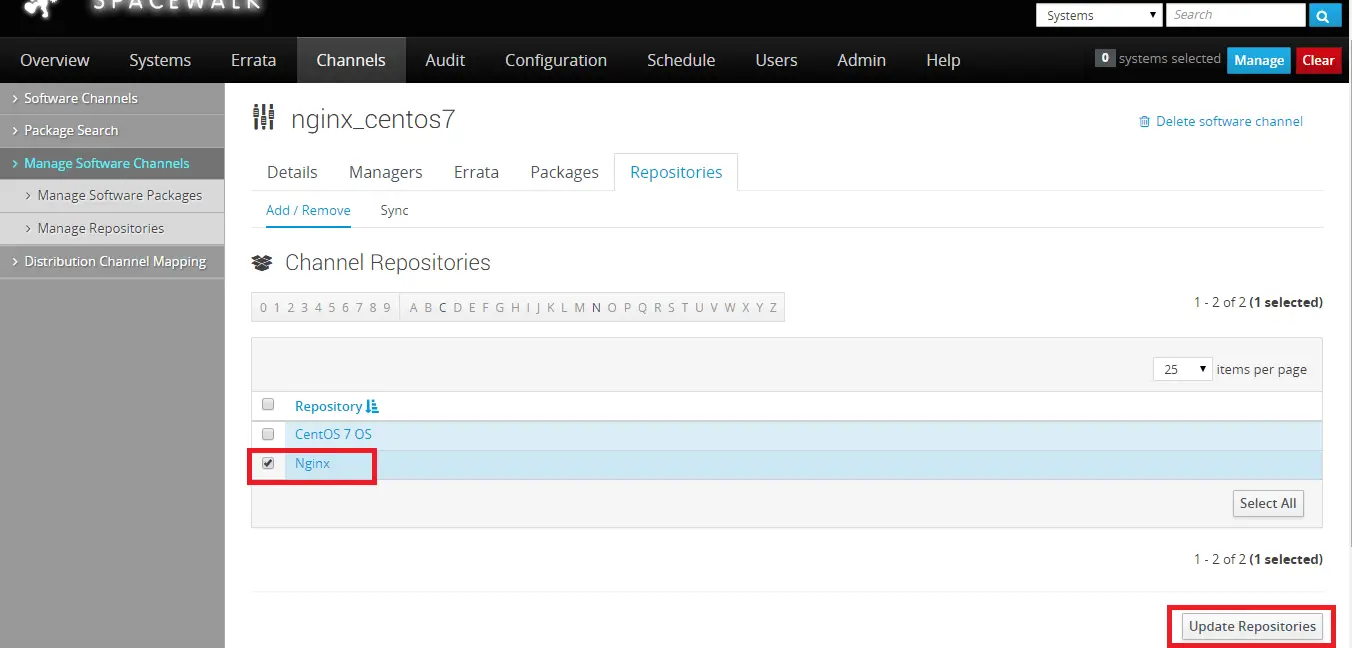
Goto Channels –> Manage Software Channels –> Select the created channel (itzgeek_centos7) –> Repository –> Select the previously created repository –> Update repository.
Managing Channels and Repositories – Adding Repository to Base Channel
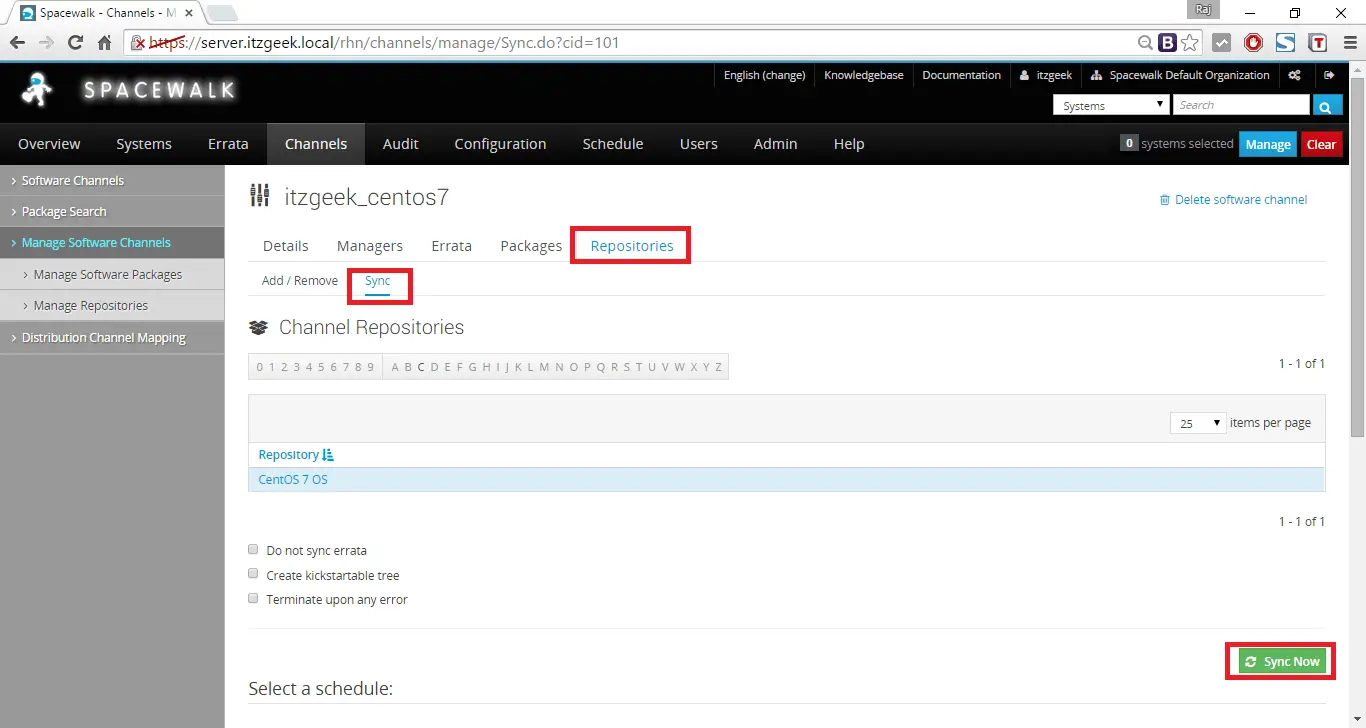
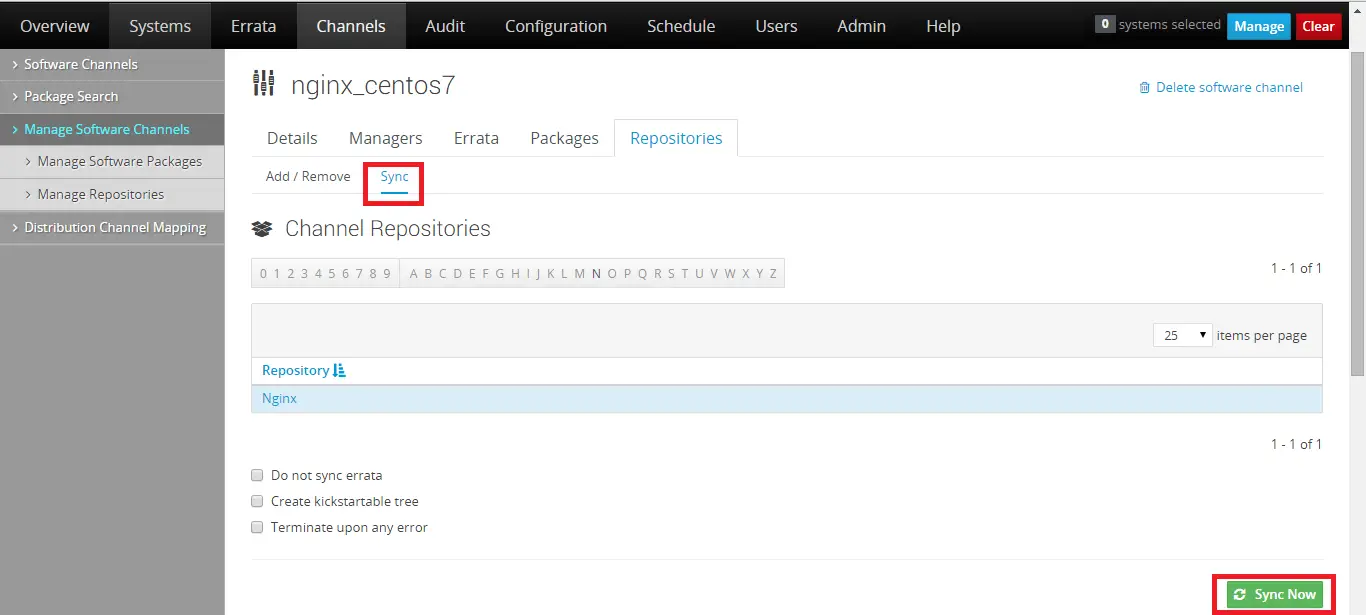
Now its time to sync packages from upstream server, Go to Channels –> Manage Software Channels –> Select the created channel –> Repository –> Sync –> Sync Now.
Managing Channels and Repositories – Sync Base Channel
You can go through sync logs to troublehoot any issues arise during the synchronization.
# cat /var/log/rhn/reposync/reponame.log
Note: The packages will be downloaded from the upstream server will be kept in /var/satellite/ folder of your Spacewalk server. Make sure you have enough space in /var/satellite/ folder.
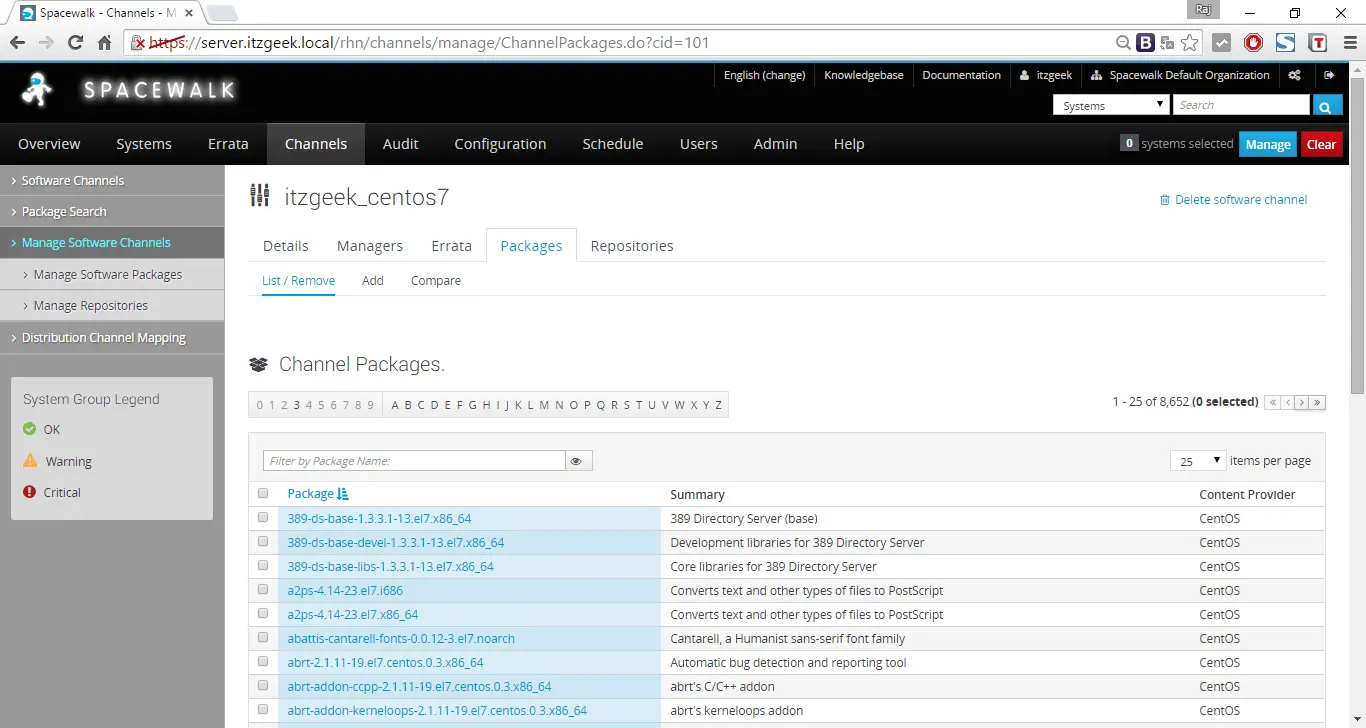
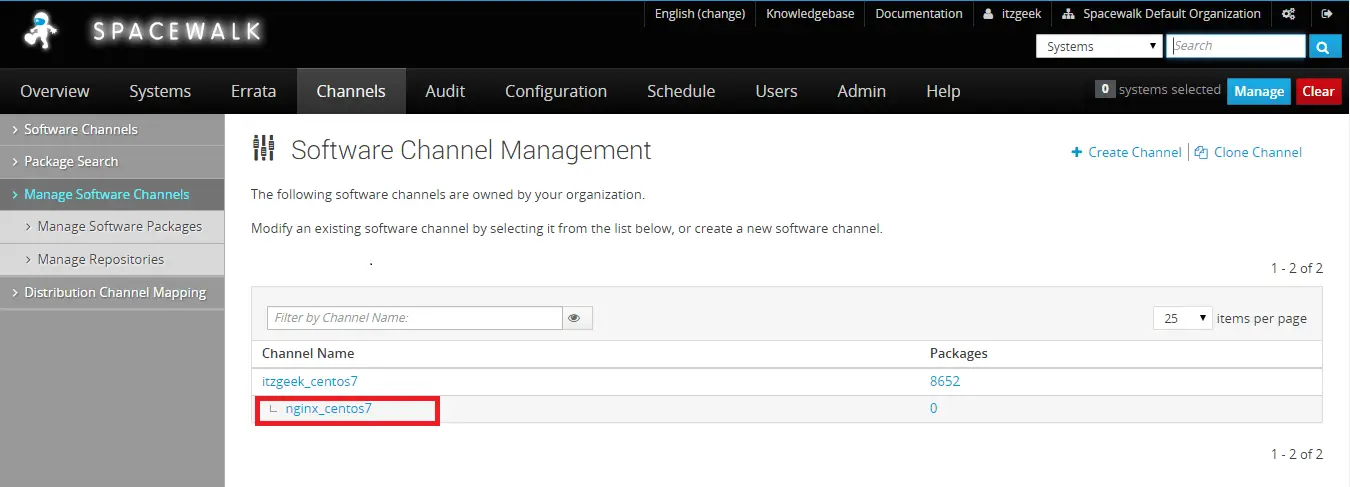
Once the package synchronization is completed, you can list the packages by going to Channels –> Manage Software Channels –> Select your channel –> Packages –> List / Remove.
Managing Channels and Repositories – Channel Packages
Create Activation Key:
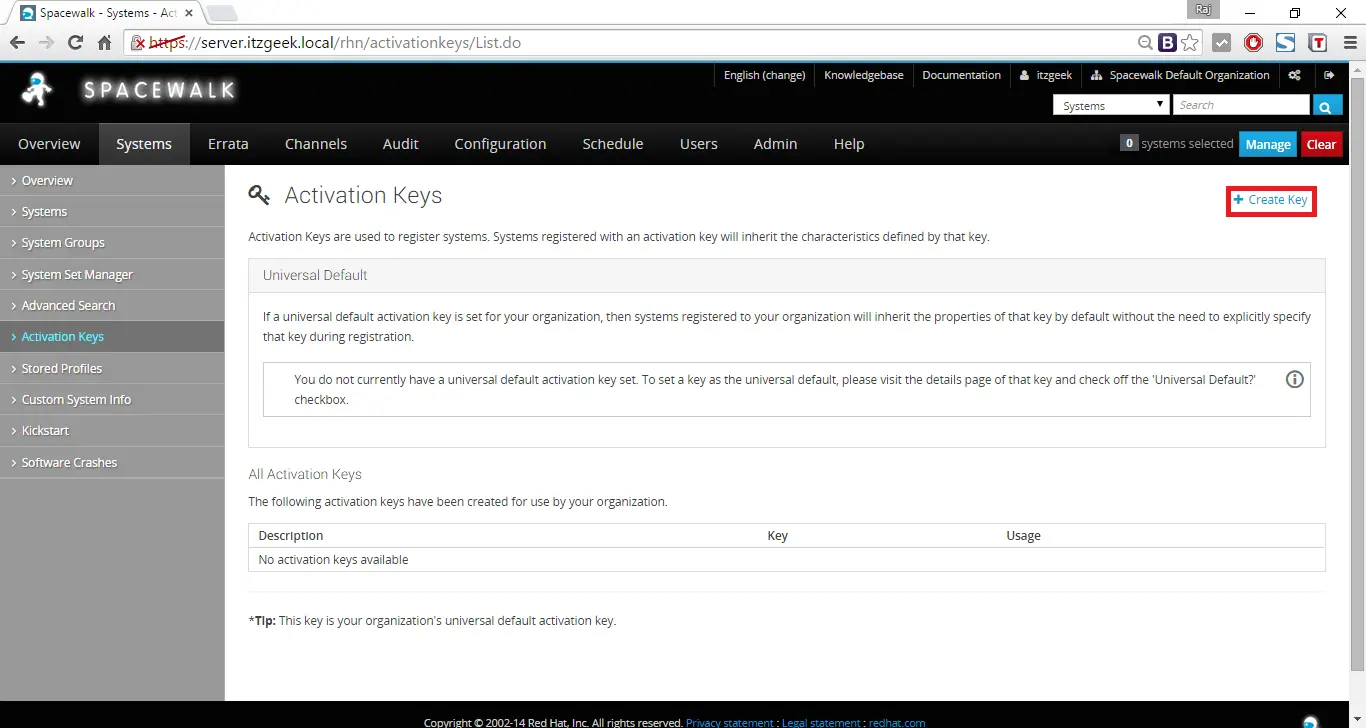
Goto Systems –> Activation Keys –> Create New Key.
Managing Channels and Repositories -Activation Keys
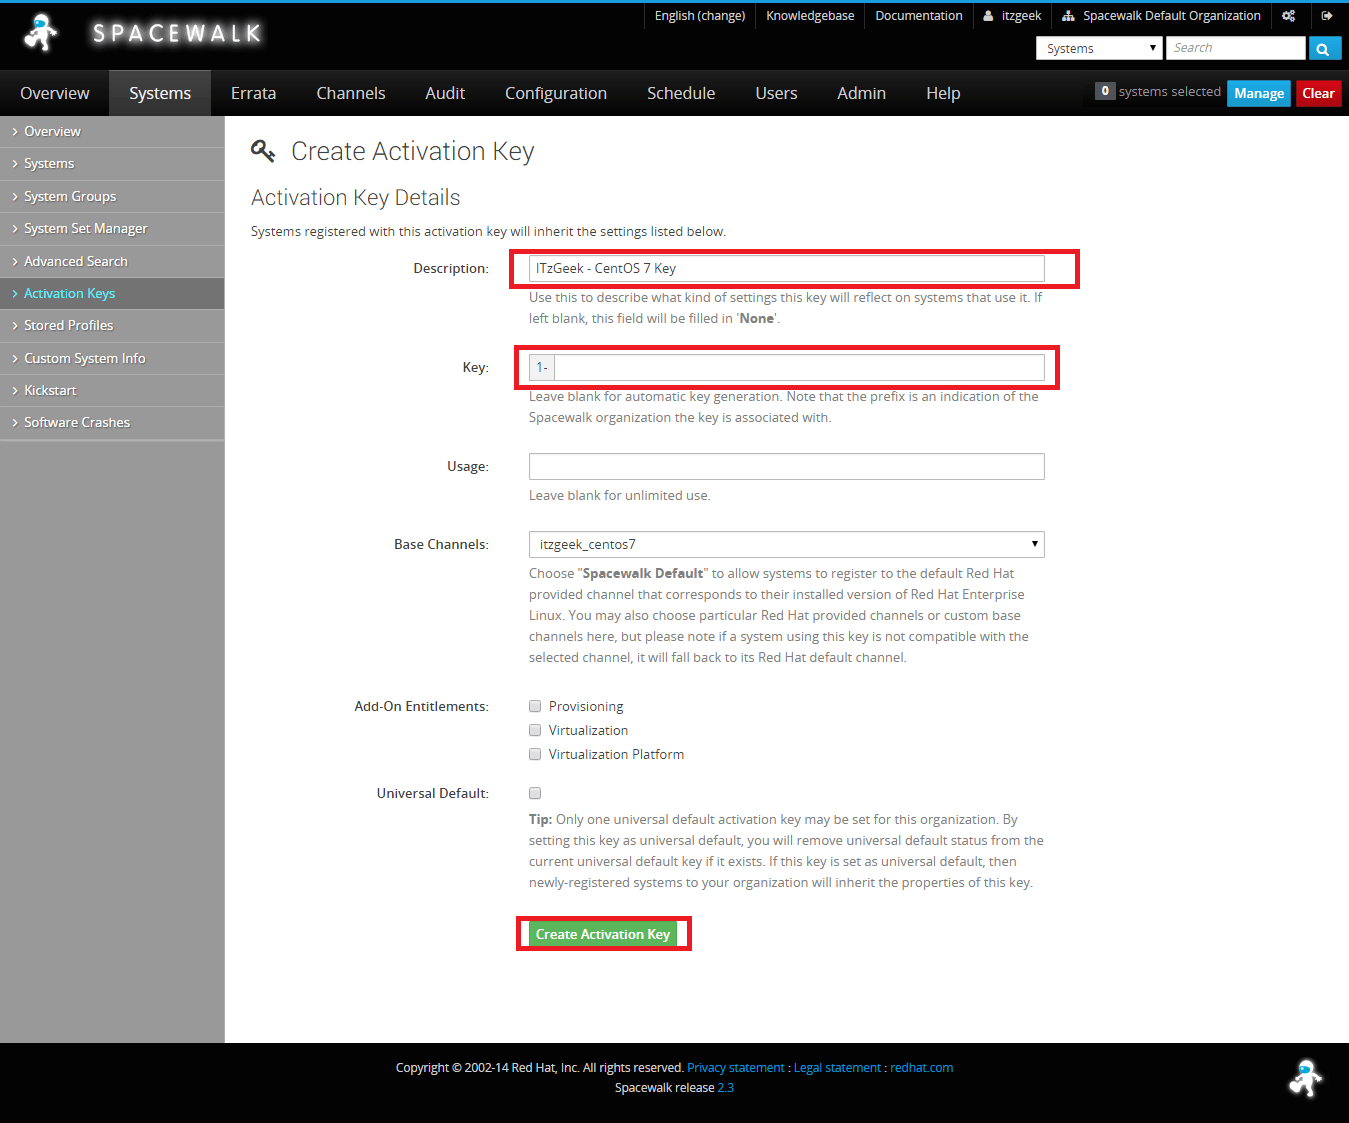
Here you can create a activation keys for client subscription, in this page you need to select the base channel ( itzgeek_centos7).
Whenever any client uses this key, the client machine will be automatically subscribed to the created channel. You can create multiple keys; in case you would like to use multiple channels.
Note: Better to leave the key blank for automatic generation.
Managing Channels and Repositories -Create Activation Key
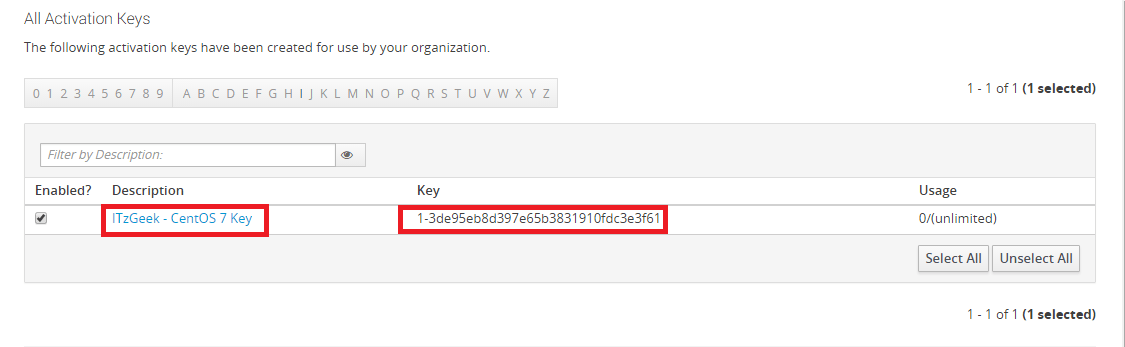
You can get a list of activation key by going to Systems –> Activation Keys.
Managing Channels and Repositories – All Activation Keys
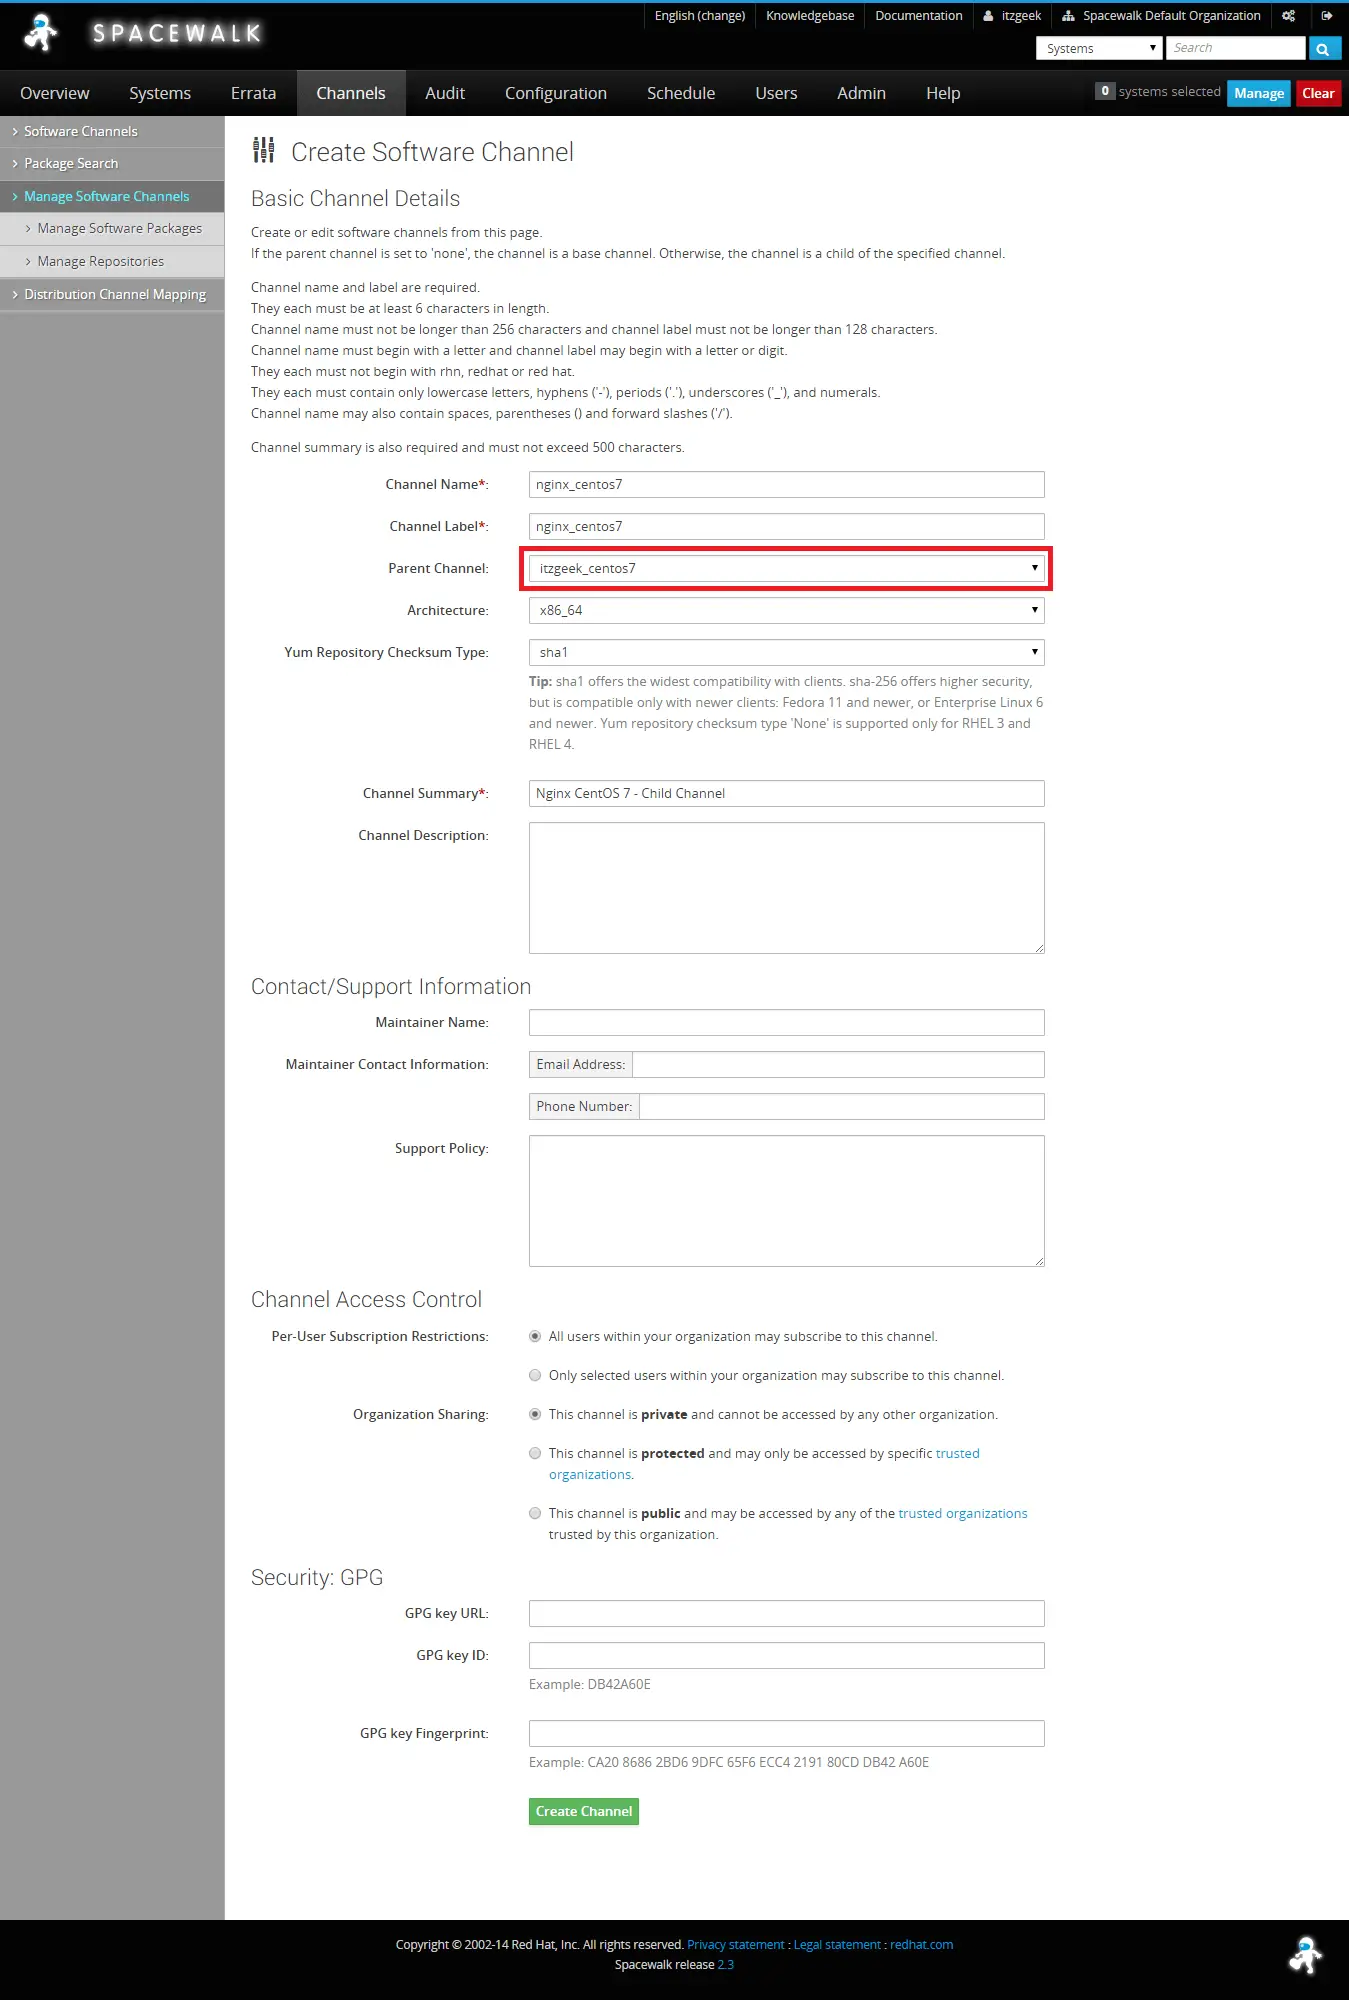
Creat a Child Channel:
Goto Channels –> Manage Software Channels –> Create New Channel. Enter the Child channel name, label, Parent channel, Architecture, and Channel description etc. Here you must select the Parent channel from the drop down list. Finally, click Create Channel button.
Managing Channels and Repositories – Create a child channel
SolutionComments Off on How to install SpaceWalk on CentOS 7 / RHEL 7
Sep072015
Install Spacewalk
Spacewalk is an open source package and system management solution for RedHat derivative distributions like CentOS, Scientific Linux and Fedora, developed by the spacewalk community. Spacewalk is the upstream project for the source of Red Hat Satellite, It is released under GPLv2 license.
Spacewalk provides the web interface to manage and view the updates for the system that are registered with Spacewalk, we can initiate the task such as install, update, inventory, and so on. Here is the small tutorial about installing Spacewalk on CentOS 7 / RHEL 7.
Features:
Inventory of the systems
Install and Update system packages.
Configuring Kick-start installation.
Deploy and Manage the configuration files from singe location
Start / Stop / Configure the guests.
Distribute the content across the multiple Geo graphical location using spacewalk proxy.
Prerequsites
Outbound open ports 80, 443
Inbound open ports 80, 443, 5222 (only if you want to push actions to client machines) and 5269 (only for push actions to a Spacewalk Proxy), 69 udp if you want to use tftp
Storage for database: 250 KiB per client system + 500 KiB per channel + 230 KiB per package in channel (i.e. 1.1GiB for channel with 5000 packages)
Storage for packages (default /var/satellite): Depends on what you’re storing; Red Hat recommend 6GB per channel for their channels
2GB RAM minimum, 4GB recommended
Underlying (SpaceWalk Server) OS is fully up-to-date.
Environment:
HostName : server.itzgeek.local
IP Address : 192.168.12.3
OS : CentOS Linux release 7.1.1503 (Core)
Setup Repositories:
Before installing Spacewalk on CentOS, we must configure required repositories for Spacewalk setup.
Lets first setup Spacewalk repository, at the time of writing, latest available Spacewalk version was 2.3.
Add port 5222 if you want to push actions to client machines and 5269 for push actions to a Spacewalk Proxy, 69 udp if you want to use tftp.
Restart firewall service using command:
firewall-cmd --reload
SpaceWalk Database:
SpaceWalk supports PostgreSQL (version 8.4 or higher) or Oracle ( version 10g or higher) as a database for storing its data.
Embedded Database:
Spacewalk has the embedded setup for PostgrSQL database which will do the automatic Spacewalk installation without having user intervention to enter the database information. Embedded database method is very easy to setup and run the Spacewalk in no time; this is very useful for those who do not have any database knowledge.
yum install spacewalk-setup-postgresql
External Database:
You can use the external PostgreSQL or Oracle database to install Spacewalk, you can find the tons of documents online to setup database.
Installing SpaceWalk:
If you are planning use PostgreSQL database (Either Embedded or External PostgreSQL database).
yum install spacewalk-postgresql
If you are planning to use Oracle database.
yum install spacewalk-oracle
Configuring SpaceWalk:
If you have installed embedded database, then use below command. It will ask you to enter the admin mail and organization details to generate the self signed certificate for secured access.
spacewalk-setup --disconnected
if you have setup database manually, then use below commands depend on database type. It will ask you to enter external database details.
Since i am using embedded postgresql database, an example session is as follows;
# spacewalk-setup --disconnected
* Setting up SELinux..
** Database: Setting up database connection for PostgreSQL backend.
** Database: Installing the database:
** Database: This is a long process that is logged in:
** Database: /var/log/rhn/install_db.log
*** Progress: ###
** Database: Installation complete.
** Database: Populating database.
*** Progress: ############################
* Configuring tomcat.
* Setting up users and groups.
** GPG: Initializing GPG and importing key.
** GPG: Creating /root/.gnupg directory
You must enter an email address.
Admin Email Address? [email protected]## Email Address ##
* Performing initial configuration.
* Activating Spacewalk.
** Loading Spacewalk Certificate.
** Verifying certificate locally.
** Activating Spacewalk.
* Configuring apache SSL virtual host.
Should setup configure apache's default ssl server for you (saves original ssl.conf) [Y]? ## Press Y ##
** /etc/httpd/conf.d/ssl.conf has been backed up to ssl.conf-swsave
* Configuring jabberd.
* Creating SSL certificates.
CA certificate password? ## Enter Certificate Password ##
Re-enter CA certificate password? ## Re Enter Certificate Password ##
Organization? ITzGeek## Your Organization Name ##
Organization Unit [server.itzgeek.local]? Linux## Your Organization Unit ##
Email Address [[email protected]]? ## Email Address ##
City? Albany## Your City ##
State? NY## Your State ##
Country code (Examples: "US", "JP", "IN", or type "?" to see a list)? US## Your Country ##
** SSL: Generating CA certificate.
** SSL: Deploying CA certificate.
** SSL: Generating server certificate.
** SSL: Storing SSL certificates.
* Deploying configuration files.
* Update configuration in database.
* Setting up Cobbler..
Cobbler requires tftp and xinetd services be turned on for PXE provisioning functionality. Enable these services [Y]? ## Press Y ##
* Restarting services.
Installation complete.
Visit https://server.itzgeek.local to create the Spacewalk administrator account .
On complete, start the Spacewalk service if not started automatically.
/usr/sbin/spacewalk-service start
Open up your browser and navigate it to https://ip-add-ress or https://your-domain-name.
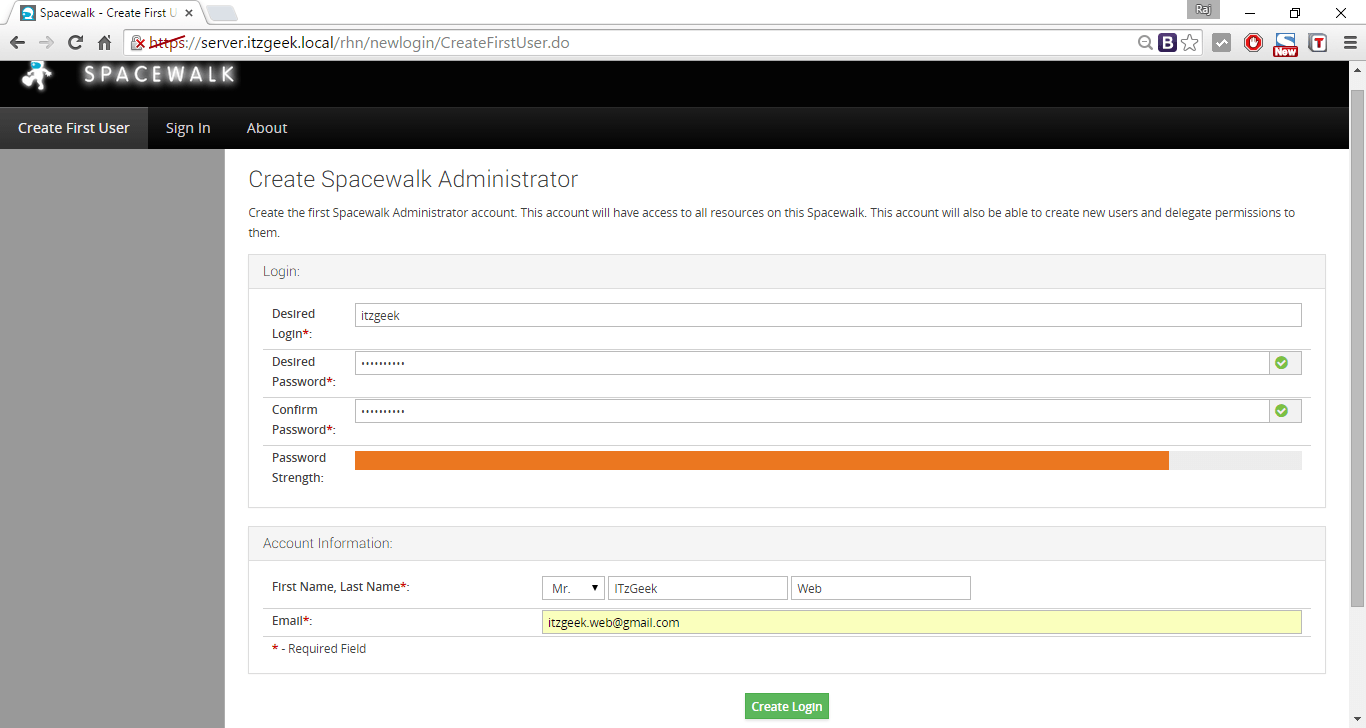
You will be asked to create administrator account for spacewalk, fill up details and click on Create Login.
Install Spacewalk on CentOS 7 – Create Spacewalk Administrator
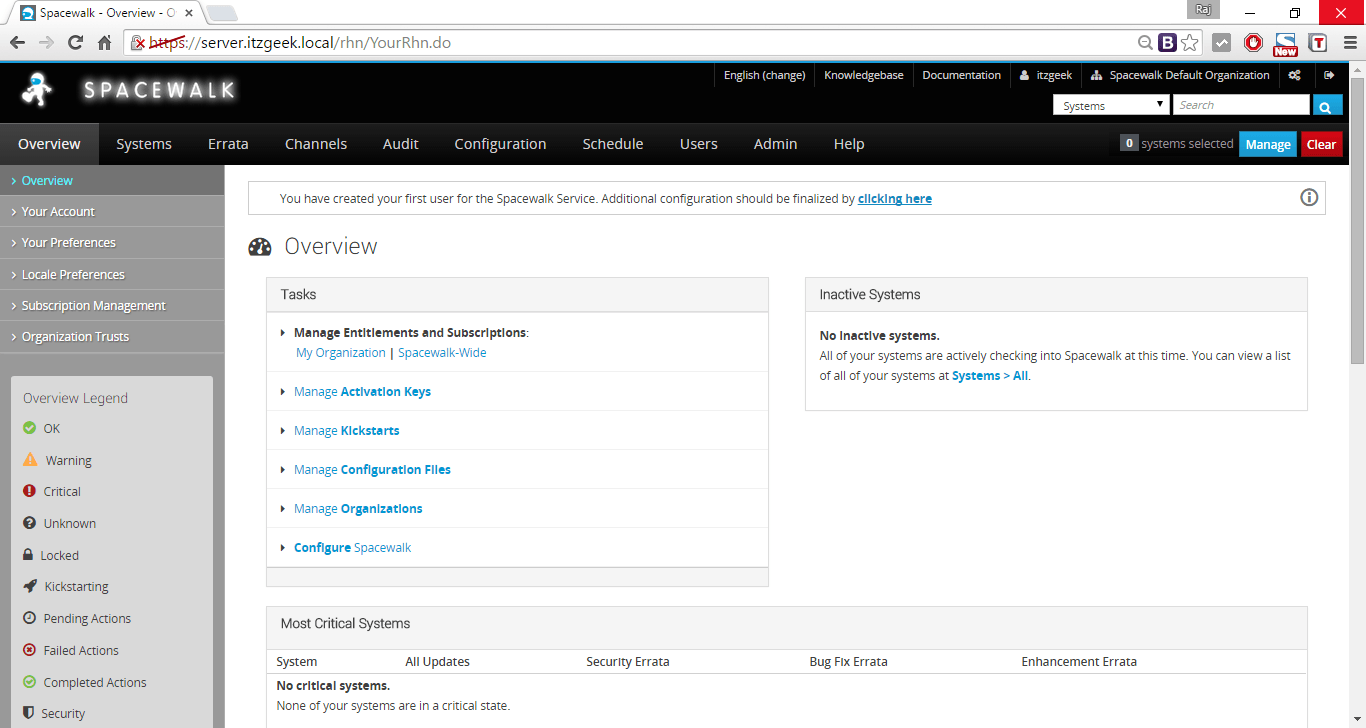
Once administrator account is created, it will take you to home page of spacewalk where you can do all administration activities.
Install Spacewalk on CentOS 7 – Overview of Spacewalk
That’s All!!!, you have sucessfully installed Spacewalk on CentOS 7 / RHEL 7. Next tutorial is about Configuring the SpaceWalk to distribute the updates for CentOS clients.
LinuxComments Off on Setup SysLog Server on CentOS 6 / RHEL 6
Sep072015
Today we will be looking into how to setup a centralized log management for Linux servers, this will help the Linux admin to have a multiple server logs into one single place. The Linux admin not required to login in to each servers for checking the logs, he can just login into the centralized server and start do the logs monitoring.
Linux labels (auth, cron, ftp, lpr, authpriv, news, mail, syslog, etc ,..) the log messages to indicate the type of software that generated the messages with severity (Alert, critical, Warning, Notice, info, etc ,..).
Now all the message logs are sent to the central server and also it keeps the copy locally.
Firewall Port opening (Optional):
Mostly all the production environment are protected by hardware firewall, ask them to open the TCP & UDP 514. You can verify the port opening by issuing the following command from the client.
[root@client ~]# telnet 192.168.0.105 514

Trying 192.168.0.105...
Connected to 192.168.0.105.
Escape character is '^]'.
If it didn’t give any reply, disable firewall on both client and server.
Test:
Monitor the activity from the log server, open the message log.
[root@server ~]# tailf /var/log/messages
Now restart xinetd service on client, Now you can get the service restart message on the syslog server.
Oct 17 15:06:41 client xinetd[4280]: xinetd Version 2.3.14 started with libwrap loadavg labeled-networking options compiled in.
Oct 17 15:06:41 client xinetd[4280]: Started working: 0 available services
By this way you can monitor the other logs such as secure, mail, cron logs etc.
MonitoringComments Off on Install Nginx on CentOS 7 / RHEL 7
Sep072015
Nginx is a popular lightweight server for those who do not need the bulk and extra services that Apache may offer. This article will look at installing Nginx on a CentOS using the ‘yum’ package manager.
Install Nginx:
To install Nginx using yum we need to include the Nginx repository, install the Nginx repository.
Install the Nginx by issuing the following command.
yum install nginx
Starting Nginx:
Once installed, start the Nginix by using the following command.
systemctl start nginx.service
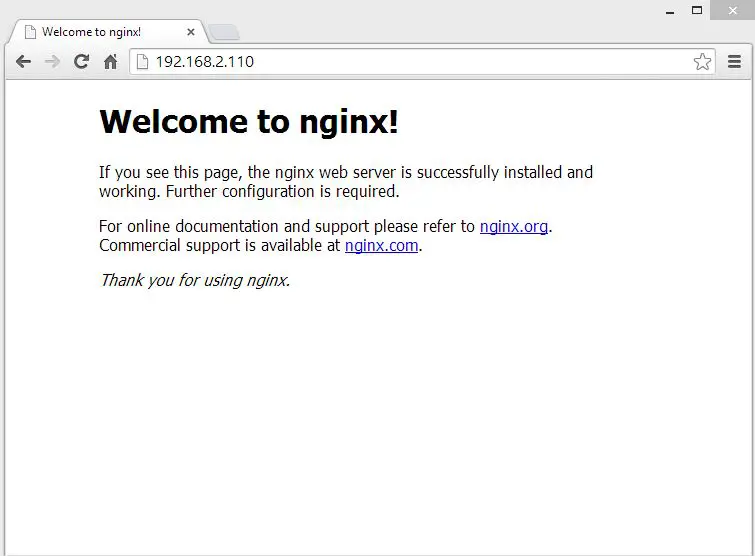
Once started. Navigate the web browser to Nginx server(IP Address or Host Name). The following image shows the default Welcome Screen of Nginx.
CentOS 7 – Nginx Default Page
Extras:
Init scripts will help you to start and stop the service. The init scripts for the Nginx is installed while installing Nginx. However, we need to set up Nginx to start automatically if the server is rebooted:
systemctl enable nginx.
Configuration File:
The name of the default configuration file is nginx.conf, located in /etc/nginx directory. Configuration file is based on directives and parameters, each directive ends with a semi colon. The following shows the directives for worker connection and in which user name Nginx process should run.
user nginx;
worker_processes 1;
events {
worker_connections 1024;
}
Creating a Virtual Server:
We must setup at least one virtual server for Nginx, in order to process the HTTP request by Nginx. When Nginx process the request, it looks for the server directive which is placed in http context. You can add multiple server directives, to define multiple virtual servers.
Default virtual server config can be found under /etc/nginx/conf.d directory, if you open and see that; first line itself a virtual server for localhost and listening on port 80.
server {
listen 80;
server_name localhost;
}
You will find the location directive, which will tell the server to look for the static file when the requests comes for the localhost.
location / {
root /usr/share/nginx/html;
index index.html index.htm;
}
The above is the minimum configuration for a virtual server, you can find the full configuration here.
Example:
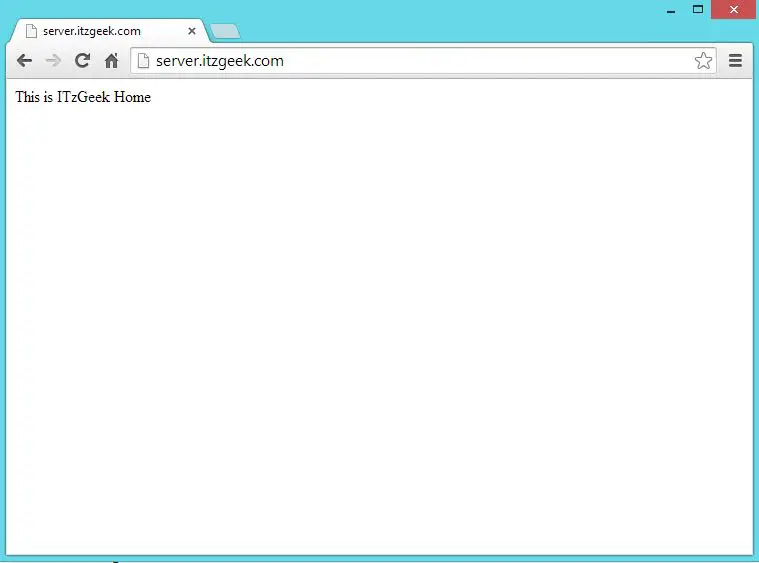
The following virtual server will accept the request for server.itzgeek.com, create a configuration file in/etc/nginx/conf.d or copy the default configuration file.
LinuxComments Off on How to install Java SDK 1.8 on RHEL 7/ CentOS 7
Sep072015
Today we will be looking into the installation of Oracle Java SDK 1.8_u5 on RHEL / CentOS, Java SDK is the most important base to the developers; this guide will be more useful for them to setup development environment when they especially uses Redhat or CentOS.
Download Java SDK:
You can either use command line or browser to download the JDK, better to use the browser, the easiest one. Visit the Oracle SDK page to download. If you still want to use the command line, use the below command.
There are 2 programs which provide 'java'.

  Selection    Command
-----------------------------------------------
*+ 1           /usr/lib/jvm/java-1.7.0-openjdk-1.7.0.51-2.4.5.5.el7.x86_64/jre/bin/java
   2           /usr/jdk1.8.0_11/bin/java

Enter to keep the current selection[+], or type selection number: 2
Verify the Java:
Once setup the alternatives, verify the java version installed using the following command.
# java –version

java version "1.8.0_11"
Java(TM) SE Runtime Environment (build 1.8.0_11-b12)
Java HotSpot(TM) 64-Bit Server VM (build 25.11-b03, mixed mode)
Setup Environmental Variable:
The most important part has come now, it should be set before the installation of any java based applications.
LinuxComments Off on Install Apache Tomcat 8 on CentOS 7 / RHEL 7
Sep072015
Apache Tomcat is an open source web server and servlet container developed by the Apache Software Foundation (ASF). Tomcat implements the Java Servlet and the JavaServer Pages (JSP) specifications from Oracle and provides a “pure Java” HTTP web server environment for running the Java codes. Apache Tomcat includes tools for configuration and management, but can also be configured by editing XML configuration files.
Here is the step by step guide to install Apache Tomcat 8.0 on RHEL 7 / CentOS 7.
Open Terminal.
Switch to root user.
Install OpenJDK:
Tomcat requires to have java installed on your machine, you can either have Oracle JDK or OpenJDK installed on your machine. Here i used the openjdk, lets install openjdk by issuing the following command.
[root@server ~]# yum install java-1.7.0
You can also verify it, by issuing the following command.
[root@server ~]# java -version
java version “1.7.0_65″
OpenJDK Runtime Environment (rhel-2.5.1.2.el7_0-x86_64 u65-b17)
OpenJDK 64-Bit Server VM (build 24.65-b04, mixed mode)
Download & Setup Apache Tomcat:
Download the latest version of the Apache Tomcat from the website and save it on your home directory.
Using CATALINA_BASE: /var/local/apache-tomcat-8.0.9
Using CATALINA_HOME: /var/local/apache-tomcat-8.0.9
Using CATALINA_TMPDIR: /var/local/apache-tomcat-8.0.9/temp
Using JRE_HOME: /usr
Using CLASSPATH: /var/local/apache-tomcat-8.0.9/bin/bootstrap.jar:/var/local/apache-tomcat-8.0.9/bin/tomcat-juli.jar
Tomcat started.
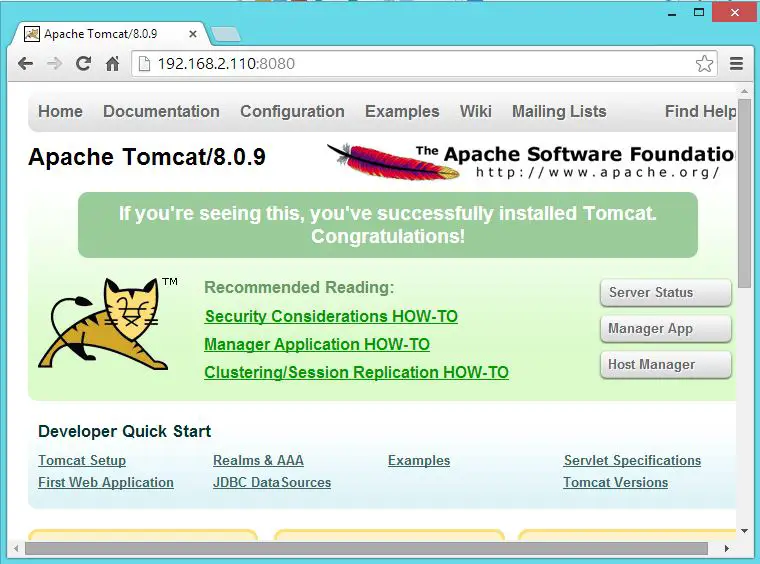
You can verify the service running, by default tomcat runs on port no 8080
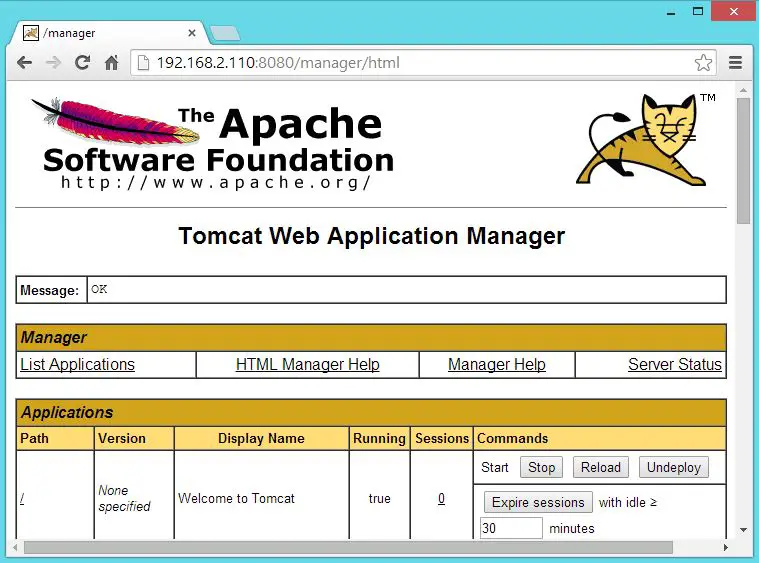
Tomcat can be managed through the web-manager, the following can be done through that.
Deploy new application, deploy new application on specified context, list the active or in active applications, start and stop the web applications.
Web manager is password protected, requires user name and password to access. Only the user with the “manager-gui” role is allowed to access, these users and roles are defined in tomcat-users.xml. By default “manager-gui” role not defined that file, we need to add it manually.
[root@server ~]# vi /var/local/apache-tomcat-8.0.9/conf/tomcat-users.xml
Place the following two lines just above the last line.